
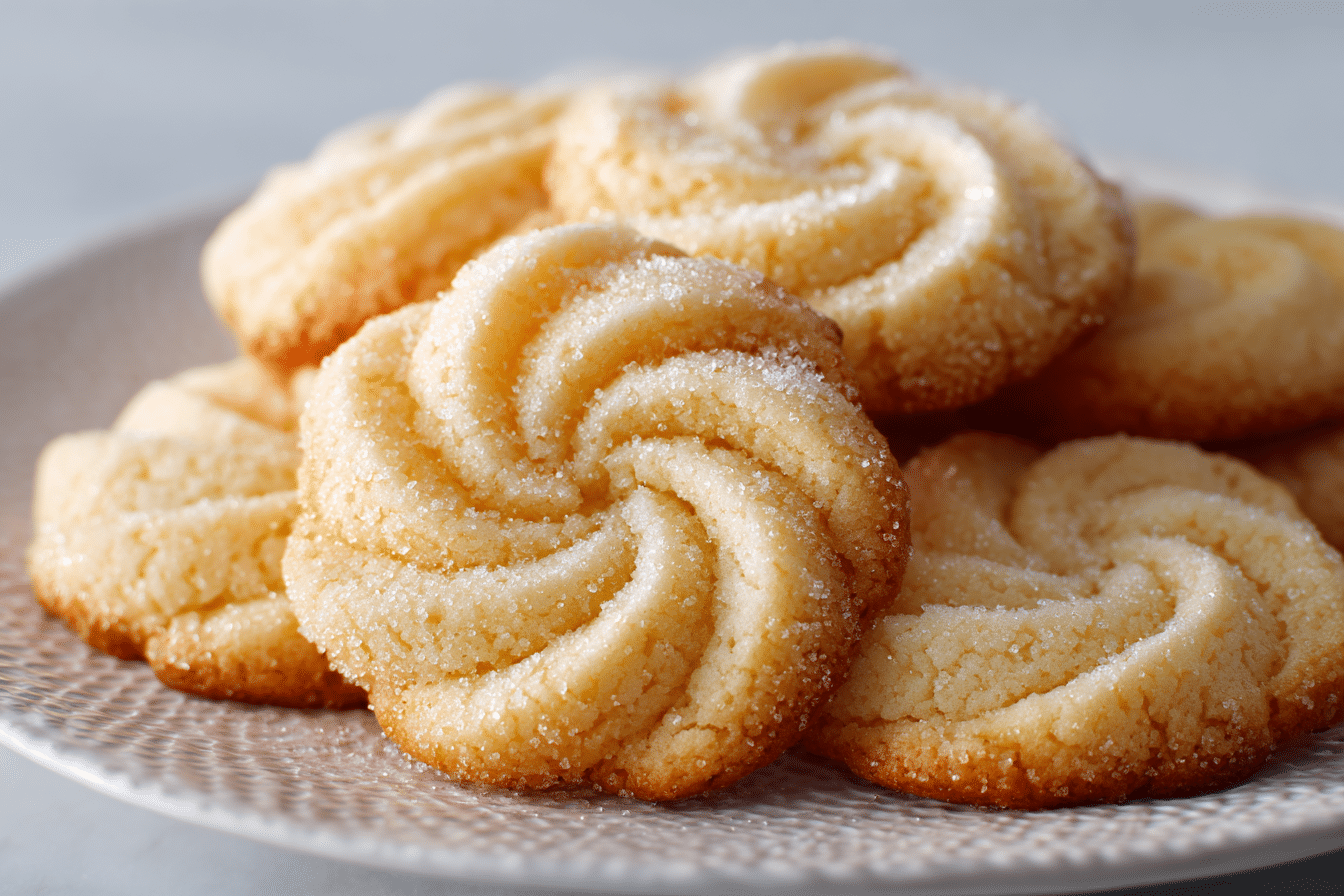
There’s something comforting and nostalgic about butter cookies. Their crumbly, melt-in-your-mouth texture and rich, buttery flavor make them a timeless treat for all ages. What makes this stovetop version so exciting is how simple and accessible it is — no oven needed.
This Super Easy Stovetop Butter Cookies recipe brings you all the charm of classic butter cookies with just a few pantry staples and a skillet. Whether you’re in a dorm, camping, or just don’t want to turn on the oven, this method delivers crispy, golden-edged cookies with tender centers, ready in minutes.
Inspired by traditional Danish-style butter cookies, this version is slightly softer due to the stovetop cooking, yet still delivers the toasty, vanilla-kissed flavor we love. Let’s break down how to bring this easy cookie dream to life.
Ingredients Overview
The beauty of these stovetop butter cookies lies in their simplicity. Every ingredient matters, and their quality will shine through in the final flavor and texture.
Unsalted Butter
The foundation of any good butter cookie. Use high-quality unsalted butter to control the salt content and highlight the natural richness. Room temperature butter is best — it creams easily with sugar and forms a smooth dough.
Tip: European-style butter (with higher fat content) will give the cookies a richer taste and crispier edges.
All-Purpose Flour
Standard all-purpose flour creates the perfect crumb — not too cakey, not too tough. Sift it for a lighter texture and avoid overmixing, which can make the cookies dense.
Alternative: For a gluten-free version, a 1:1 gluten-free flour blend works well.
Powdered Sugar
Powdered sugar melts beautifully into the dough and lends a tender, shortbread-like texture. It’s more delicate than granulated sugar, ideal for this stovetop version.
Why powdered sugar? It helps prevent grittiness, ensuring a melt-in-the-mouth finish.
Cornstarch
A small amount of cornstarch gives these cookies an extra soft and tender bite. It’s a secret weapon in many shortbread-style recipes.
Vanilla Extract
Adds warmth and aroma. Pure vanilla extract makes a noticeable difference, but you can also try almond extract or citrus zest for a variation.
Salt
Just a pinch balances the sweetness and enhances the overall flavor. If using salted butter, omit added salt.
Milk (Optional)
If your dough feels too crumbly, a teaspoon or two of milk can help bring it together without overworking it.
Step-by-Step Instructions
1. Cream the Butter and Sugar
In a medium mixing bowl, beat ½ cup of softened unsalted butter with ⅓ cup of powdered sugar until light and creamy. This step is key — it traps air, creating a softer cookie even on the stovetop.
Use a wooden spoon or hand mixer for best results. Don’t rush this; aim for a fluffy, pale texture.
2. Add Vanilla and Dry Ingredients
Stir in 1 teaspoon of vanilla extract and a pinch of salt. In a separate bowl, whisk together 1 cup all-purpose flour and 2 tablespoons of cornstarch. Gradually add this to the butter mixture, mixing just until a soft dough forms.
The dough should be smooth but not sticky. If it crumbles, add a teaspoon of milk.
3. Shape the Cookies
Roll the dough into 1-inch balls and flatten them slightly into discs with your fingers or the back of a spoon. For uniform cooking, aim for about ¼-inch thickness.
You can use a fork to gently press a crisscross pattern or use cookie cutters for fun shapes.
4. Cook on Stovetop
Heat a heavy-bottomed nonstick skillet or griddle over low heat. No oil or butter is needed if using nonstick.
Place the cookies in the skillet, leaving space between them. Cover with a lid to trap heat and cook for 5–6 minutes on the first side, or until the bottoms are lightly golden.
Flip gently and cook another 4–5 minutes on the second side. Keep the heat low — patience is key to prevent burning.
5. Cool and Serve
Transfer the cookies to a wire rack to cool. They will firm up as they cool down. Enjoy warm or at room temperature.
Tips, Variations & Substitutions
Tips for Success
-
Low and slow: Keep the heat low. Butter cookies burn easily due to their high fat content.
-
Use a lid: This helps mimic oven baking by circulating heat.
-
Don’t overcrowd the pan: Cook in batches if needed.
Flavor Variations
-
Lemon zest: Add 1 teaspoon of fresh lemon zest to the dough.
-
Chocolate chip: Fold in mini chocolate chips for a fun twist.
-
Spiced: Mix in a pinch of cinnamon or cardamom for warmth.
Dietary Substitutions
-
Gluten-Free: Use a 1:1 gluten-free flour blend.
-
Dairy-Free: Swap butter for vegan butter alternatives.
-
Sugar-Free: Use powdered erythritol, though texture may slightly differ.
Serving Ideas & Occasions
These stovetop butter cookies are a treat for nearly any occasion.
-
Afternoon tea: Serve with Earl Grey or chamomile.
-
Lunchbox favorite: A sweet yet gentle snack for kids or work breaks.
-
Holiday platter: Dress them up with a dusting of powdered sugar or a drizzle of white chocolate.
-
Camping treat: Perfect for when you don’t have an oven but still want fresh-baked comfort.
Their light crispiness pairs wonderfully with cold milk, coffee, or hot cocoa.
Nutritional & Health Notes
While not a low-calorie food, stovetop butter cookies can fit into a balanced lifestyle when enjoyed in moderation.
Each cookie (based on a batch of 18 small cookies) has approximately:
-
Calories: 90–100
-
Carbohydrates: 10–12g
-
Fat: 6g
-
Protein: 1g
They’re naturally free from eggs and easy to make nut-free. For lower sugar versions, try powdered monk fruit or erythritol. Keep portions mindful — two to three cookies can satisfy a sweet craving.
FAQs
Q1: Can I make these cookies without a nonstick pan?
Yes, but use a heavy-bottomed stainless steel or cast iron pan and very lightly grease it. Watch closely to avoid burning.
Q2: Why are my cookies burning on the bottom?
This usually means your heat is too high. Always cook on low heat and use a lid to distribute heat evenly.
Q3: Can I freeze the dough?
Yes! Shape the dough into discs or balls and freeze in a zip-top bag for up to 2 months. Thaw in the fridge and cook as instructed.
Q4: What flour is best for these cookies?
All-purpose flour works perfectly. For gluten-free versions, use a 1:1 baking blend. Avoid bread flour — it will make the cookies too chewy.
Q5: How do I store these cookies?
Store in an airtight container at room temperature for up to 5 days. For longer storage, refrigerate or freeze and reheat gently before serving.
Q6: Can I add toppings?
Yes! Try sprinkling a little cinnamon sugar before cooking, or drizzle with melted chocolate after cooling.
Q7: Can I make these vegan?
Absolutely. Use a plant-based butter alternative and check your sugar source to ensure it’s vegan-friendly.
PrintButter Cookies Recipe Easy on the Stove — No Oven Needed
A quick and easy stovetop version of classic butter cookies — rich, crumbly, and perfect without an oven.
- Prep Time: 10 minutes
- Cook Time: 10 minutes
- Total Time: 20 minutes
- Yield: 18 small cookies 1x
Ingredients
-
½ cup unsalted butter, softened
-
⅓ cup powdered sugar
-
1 cup all-purpose flour
-
2 tbsp cornstarch
-
1 tsp vanilla extract
-
Pinch of salt
-
1–2 tsp milk (optional, if dough is dry)
Instructions
-
In a bowl, cream the softened butter and powdered sugar until light and fluffy.
-
Add vanilla extract and salt.
-
In a separate bowl, whisk together flour and cornstarch.
-
Gradually mix dry ingredients into butter mixture until a soft dough forms. Add milk if needed.
-
Shape into 1-inch balls and flatten slightly into discs.
-
Heat a nonstick skillet over low heat. Place cookies in the skillet and cover with a lid.
-
Cook for 5–6 minutes on one side, flip, and cook another 4–5 minutes until golden.
-
Cool on a wire rack and serve.
Notes
Try lemon zest, almond extract, or mini chocolate chips for variety. Store in an airtight container for up to 5 days.