
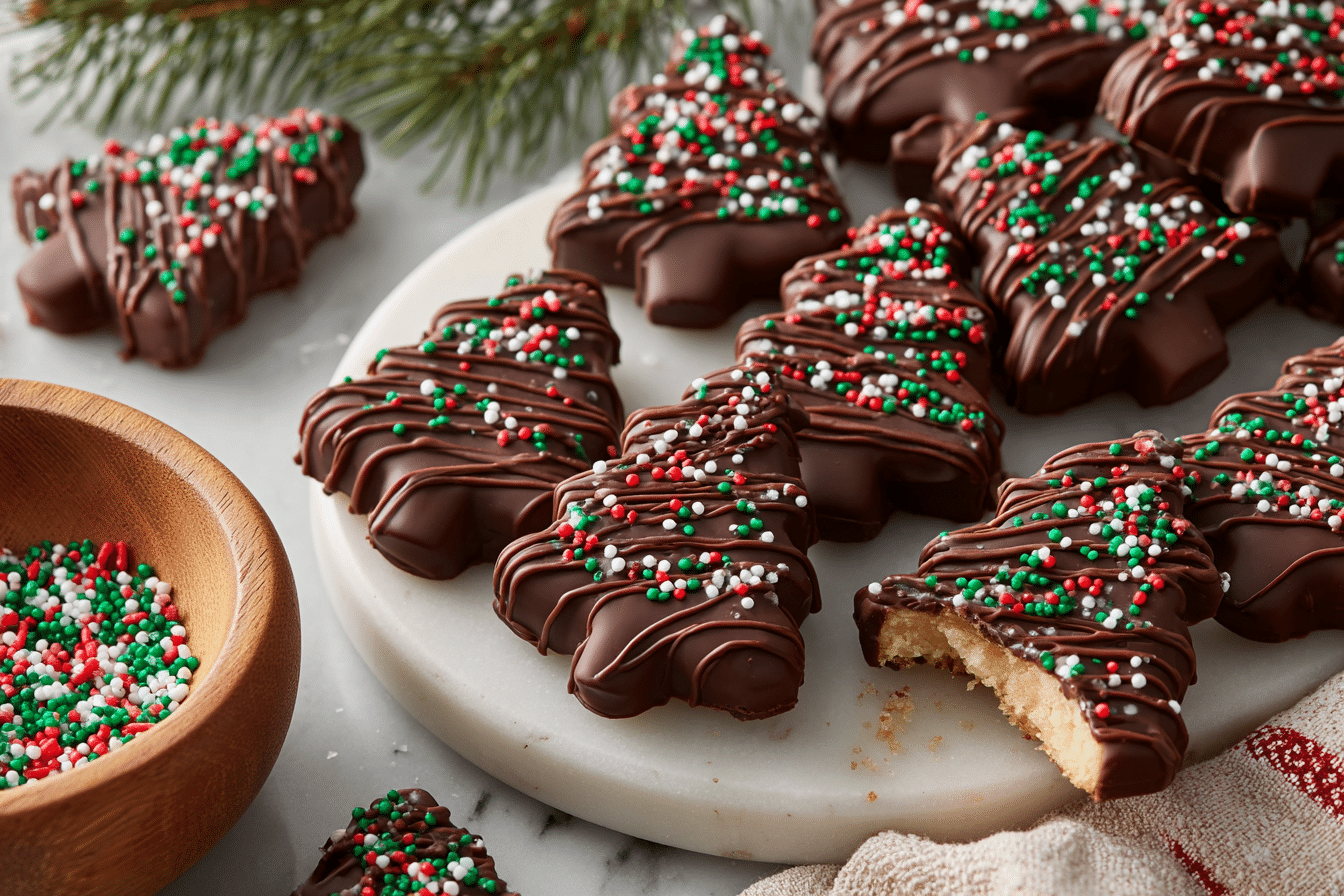
When the holiday lights twinkle and the scent of cinnamon fills the air, there’s no better way to celebrate than with Chocolate Christmas Trees. These whimsical, edible trees are not only a delightful treat for children and adults alike, but they’re also a fun kitchen project to mark the turn of the year.
Whether you’re hosting a New Year’s Eve party or planning a cozy night in, these trees bring together creamy chocolate, crunchy wafers, and festive sprinkles in a dessert that’s as decorative as it is delicious.
Easy to customize and surprisingly simple to make, Chocolate Christmas Trees are the perfect finale to your holiday menu. With their glossy chocolate coating and sprinkle-covered branches, they resemble miniature edible sculptures that double as both dessert and table decor.
Ingredients Overview
Creating these edible Christmas trees only requires a handful of pantry staples and a little imagination. Here’s a breakdown of the main ingredients that make these festive treats so delightful:
-
Dark or Milk Chocolate
The base of your tree, melted chocolate provides a smooth and rich coating. Choose a high-quality chocolate bar (around 60–70% cacao for a balanced bitterness), or use milk chocolate for a sweeter version. Chocolate chips work too, but bars melt more smoothly. -
Ice Cream Cones (Sugar or Wafer Cones)
These form the tree shape. Sugar cones provide a sturdier and crispier texture, while wafer cones are lighter and easier for kids to bite into. Either way, they mimic the triangular shape of pine trees perfectly. -
White Chocolate or Candy Melts
Ideal for “snow” effects or white drizzles. Candy melts also come in green, making decorating even easier without the need for food coloring. -
Sprinkles and Edible Decorations
Use stars, silver dragees, sanding sugar, or holiday-themed sprinkles to mimic ornaments. This is where creativity shines—each tree can be uniquely styled. -
Pretzel Sticks (Optional)
Add a “trunk” by placing the tree on a pretzel rod. It’s optional but adds to the forest illusion and provides a savory crunch. -
Butter or Coconut Oil (Optional)
Adding a small amount of fat to your melted chocolate helps with shine and smoother consistency when dipping.
Substitutions & Dietary Options:
-
Use vegan chocolate and gluten-free cones to make these allergy-friendly.
-
For dairy-free, coconut oil or vegan butter substitutes well in the chocolate melting process.
-
Sugar-free chocolate can be used for a low-carb version, but expect a slightly different texture and taste.
Step-by-Step Instructions
Creating Chocolate Christmas Trees is a hands-on, creative process that’s ideal for group baking, holiday parties, or a fun kitchen activity with kids. Here’s how to bring them to life:
-
Prepare a Workstation
Line a baking tray with parchment paper. Arrange your sprinkles, decorations, and cones so everything is within easy reach. Have a double boiler or microwave-safe bowl ready for melting the chocolate. -
Melt the Chocolate
Break chocolate into small pieces and melt in a double boiler or in the microwave in 20-second intervals, stirring between each. If desired, add 1 teaspoon of butter or coconut oil for extra shine and easier dipping. -
Dip the Cones
Hold an ice cream cone by the inside and gently roll the outside in the melted chocolate, coating it evenly. Let excess chocolate drip off, then place the cone upside-down on the parchment (point facing up). -
Decorate Quickly
Before the chocolate sets, immediately sprinkle with decorations. You can use themed colors for New Year’s (gold, silver, white) or go classic with red and green. -
Create a Snowy Look
Drizzle white chocolate over the top or use shredded coconut for a snowy effect. If you want a frosted tree, let the dark chocolate cool slightly and then gently press desiccated coconut along the sides. -
Set and Cool
Let the trees set at room temperature or refrigerate for 10–15 minutes until firm. -
Optional: Add Trunks
Insert pretzel sticks into the base of the cones before setting if you’d like them standing upright on a dessert platter.
Tips, Variations & Substitutions
-
Use Green Candy Melts: Skip food coloring by using pre-tinted green candy melts for a more vibrant “tree” appearance.
-
Add Flavors: Mix a drop of peppermint extract or orange zest into your chocolate before dipping for a wintery flavor twist.
-
Use Piping Bags: For fine detailing, use a small piping bag to “string lights” or add frosting garlands with white or red chocolate.
-
Allergy-Friendly Variations: Try using gluten-free cones, dairy-free chocolate, and nut-free decorations to accommodate guests with dietary restrictions.
-
Mini Versions: Use mini cones or cut regular cones in half for bite-sized party treats.
Cultural Variations:
-
In Europe, especially Germany and Austria, holiday trees are often made with marzipan and nougat, so you can fill cones with almond paste before dipping.
-
In Scandinavian traditions, “tree-shaped” desserts are used in cookie towers or kransekake — you could borrow their almond flour notes for flavor inspiration.
Serving Ideas & Occasions
Chocolate Christmas Trees aren’t just a treat—they’re a conversation piece. Here’s how to serve them with style:
-
New Year’s Eve Party Dessert Table: Arrange the trees on a cake stand or create a mini forest display with powdered sugar “snow” and fresh rosemary sprigs.
-
Holiday Gifting: Wrap each tree in clear cellophane with a ribbon and tag—it makes a thoughtful homemade gift.
-
Kid-Friendly Craft Activity: Let children decorate their own trees during family gatherings.
-
Centerpiece Dessert: Use larger cones to create one “main tree” and surround it with smaller ones for a showstopping centerpiece.
Pair with a glass of eggnog, hot chocolate, or sparkling cider for a complete winter treat moment.
Nutritional & Health Notes
Chocolate Christmas Trees are indulgent, but portion-controlled, especially when made with small cones. Here’s a general idea of their nutritional profile per tree (using standard ingredients):
-
Calories: ~180–250 depending on size and toppings.
-
Carbs: Mostly from the cone and chocolate.
-
Fats: Moderate, primarily from cocoa butter.
-
Sugar: Can be high with sweet decorations; opt for darker chocolate to reduce this.
-
Protein: Minimal unless adding nut-based decorations or fillings.
For a cleaner version, choose 70% dark chocolate, unsweetened coconut flakes, and skip sugary sprinkles. Gluten-free and dairy-free variations are easy to achieve without sacrificing taste.
FAQs
Q1: Can I make Chocolate Christmas Trees ahead of time?
Yes, these are ideal for prepping in advance. Store them in an airtight container in a cool, dry place for up to 5 days. Avoid refrigeration unless necessary, as moisture can cause chocolate to bloom (a white coating).
Q2: Can I freeze the finished trees?
Freezing isn’t recommended, as the cones may become soggy upon thawing and the chocolate can lose its glossy finish. If you must freeze, wrap tightly in plastic and thaw in the fridge.
Q3: How do I keep the chocolate from clumping while melting?
Use a double boiler or microwave in short bursts, stirring consistently. Adding a teaspoon of coconut oil or butter helps keep it smooth.
Q4: Are there sugar-free options for this recipe?
Yes! Use sugar-free or stevia-sweetened chocolate, and opt for unsweetened coconut or keto-friendly sprinkles. Keep in mind these chocolates melt differently, so stir gently.
Q5: Can I fill the cones with anything?
Absolutely. Fill with mini marshmallows, peanut butter, or Nutella before dipping for a fun surprise inside. Let the filling firm up before coating in chocolate.
Q6: How do I get the trees to stand upright?
Use a small dab of melted chocolate on the base to “glue” them to a cookie or pretzel disk. Alternatively, insert pretzel sticks for trunks and anchor them in frosting or styrofoam.
Q7: What’s the best chocolate to use?
Couverture chocolate is ideal for smooth, glossy coating, but any good-quality baking bar will work. Avoid low-grade chocolate chips, which often include stabilizers that affect melting.
Chocolate Christmas Trees for New Year • Easy Festive Snack Idea
Festive, crunchy, and chocolatey, these easy Chocolate Christmas Trees are perfect for New Year’s parties or holiday gifting.
- Prep Time: 20 minutes
- Cook Time: 5 minutes (melting)
- Total Time: 25 minutes
- Yield: 6 trees 1x
Ingredients
-
6 sugar cones
-
1 ½ cups dark or milk chocolate, chopped
-
1 tsp coconut oil or butter (optional)
-
½ cup white chocolate or green candy melts
-
Assorted sprinkles, sanding sugar, and edible stars
-
Pretzel sticks (optional, for trunks)
-
Shredded coconut (optional, for snow)
Instructions
-
Line a tray with parchment paper and set out decorations.
-
Melt chocolate in a microwave-safe bowl or double boiler. Stir until smooth.
-
Hold cones and dip into melted chocolate to coat fully.
-
Place dipped cones upside-down on the tray and decorate quickly.
-
Melt white chocolate and drizzle over for snow, if desired.
-
Let trees set at room temp or chill for 10–15 minutes until firm.
-
Optional: insert pretzel sticks into base to create trunks.
Notes
Store in an airtight container up to 5 days. Use different candy melts for color variations. Add filling for extra fun.