
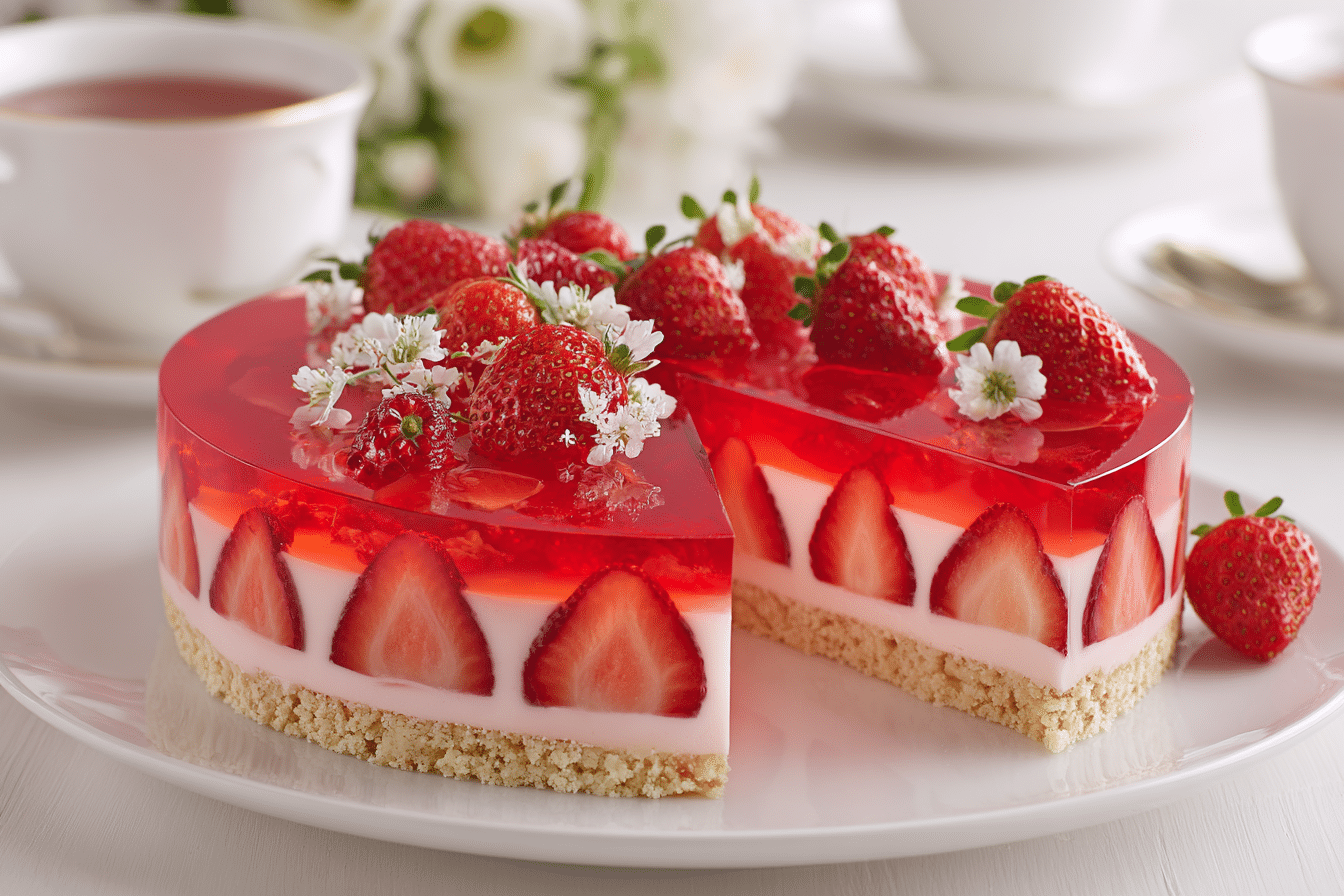
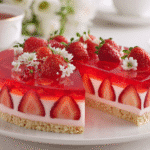
The Elegant Strawberry Jelly Cake is a delicate, layered dessert that’s as gorgeous as it is refreshing. With its translucent strawberry glaze, soft sponge base, and creamy middle layer, this cake is a centerpiece-worthy creation — perfect for spring gatherings, birthdays, bridal showers, or anytime you want a light, fruity dessert that impresses at first glance.
This cake originates from European patisserie traditions, where fruit-topped jelly cakes are prized for their beauty and lightness. The fresh strawberries suspended in a clear jelly layer look almost too pretty to eat, while the layers underneath balance sweet, creamy, and airy textures.
Whether served chilled on a warm day or as a vibrant holiday treat, this strawberry jelly cake is a make-ahead marvel that always earns compliments.
Ingredients Overview
Each layer of this cake has its role — from the airy sponge to the creamy filling and glossy strawberry jelly top.
Sponge Cake Base
-
Eggs: Whipped with sugar to create a light, structured base. Room temperature eggs whip better and give more volume.
-
Granulated sugar: Sweetens the sponge while contributing to its structure.
-
Cake flour: Lower protein content gives a tender, delicate crumb.
-
Baking powder: Ensures a light rise.
-
Vanilla extract: Adds flavor and balances the fruit.
-
Salt: Enhances all the other flavors.
Tip: Sift your flour for the most delicate sponge.
Cream Layer (Optional but Recommended)
-
Cream cheese or mascarpone: Adds a velvety richness.
-
Whipping cream: Beaten to soft peaks and folded into the cheese for a mousse-like texture.
-
Powdered sugar: Blends smoothly and keeps the cream layer light and sweet.
-
Vanilla or lemon zest: For subtle brightness.
This layer sits between the sponge and jelly — it’s light but adds depth and contrast to the fruit and jelly.
Strawberry Jelly Topping
-
Fresh strawberries: Hulled and halved, they become jewel-like once set in jelly.
-
Strawberry gelatin or clear gelatin + strawberry juice: Creates a firm, glossy top layer.
-
Sugar: Optional, depending on sweetness of juice or gelatin used.
-
Lemon juice: Adds tartness and brightens the flavor.
Clear gelatin with real fruit juice gives a more natural, elegant look.
Step-by-Step Instructions
1. Bake the Sponge Cake Base
Preheat oven to 350°F (175°C). Line the bottom of an 8- or 9-inch round springform pan with parchment paper.
In a large bowl, beat:
-
3 large eggs
-
½ cup sugar
Beat on high speed until pale and tripled in volume (about 5–6 minutes).
Gently fold in:
-
½ cup cake flour
-
1 tsp baking powder
-
Pinch of salt
-
1 tsp vanilla extract
Pour into the pan and smooth the top. Bake for 18–20 minutes until golden and springy to the touch.
Cool completely in the pan.
2. Prepare the Cream Layer (Optional)
In a medium bowl, beat:
-
8 oz cream cheese (or mascarpone), softened
-
⅓ cup powdered sugar
-
1 tsp vanilla extract or lemon zest
In a separate bowl, whip:
-
¾ cup heavy cream to soft peaks
Fold the whipped cream into the cheese mixture until smooth and airy.
Spread evenly over the cooled sponge base (still in the pan) and chill for 30 minutes to firm up.
3. Arrange the Strawberries
Slice fresh strawberries in half and pat dry with a paper towel to remove excess moisture.
Arrange them cut-side down over the cream layer in a decorative pattern.
4. Make the Strawberry Jelly
If using store-bought strawberry gelatin, dissolve 1 packet (about 3 oz) in 1 cup boiling water. Stir until dissolved, then add ¾ cup cold water. Let cool to room temperature before pouring.
If using clear gelatin + juice, bloom:
-
2½ tsp unflavored gelatin (1 packet)
in -
¼ cup cold water for 5 minutes
Warm 1½ cups strawberry juice with 1 tbsp lemon juice. Add bloomed gelatin and stir until dissolved. Let cool to room temperature.
Carefully pour cooled jelly over the strawberries, making sure to fully cover them.
5. Chill to Set
Refrigerate the cake for at least 4 hours, or until the jelly is fully set.
Before serving, gently release the springform pan and use a sharp knife to clean up the edges.
Tips, Variations & Substitutions
-
Fruit swaps: Try raspberries, blueberries, or kiwi. Use clear jelly to highlight their colors.
-
Juice variations: White grape juice or rose water with gelatin makes a stunning clear jelly.
-
Cream alternative: Swap cream cheese for yogurt or coconut cream for a lighter or dairy-free option.
-
Make-ahead: This cake holds beautifully for 24–48 hours in the fridge — great for party prep.
-
Gluten-free: Use almond flour sponge or a gluten-free cake base.
If you want extra structure, add 1 tsp gelatin to the cream layer for a firmer set.
Serving Ideas & Occasions
This elegant cake is perfect for:
-
Mother’s Day or Easter
-
Bridal or baby showers
-
Garden parties and teas
-
Summer birthdays
-
Romantic dinners or light holiday desserts
Serve it chilled with a cup of green tea, prosecco, or iced rosé. Garnish with mint leaves or edible flowers for a bakery-style finish.
Nutritional & Health Notes
Strawberry jelly cake is lighter than many desserts, especially if you use the cream layer moderately.
-
Fresh strawberries offer antioxidants and vitamin C.
-
The jelly is low-fat, and the sponge is relatively lean.
-
You can reduce sugar or use sugar-free gelatin if desired.
Portion control is easy with this style of cake. Each slice is visually appealing and feels satisfying without being overly rich.
FAQs
Q1: Can I make this cake a day ahead?
Yes — it’s even better the next day! Chill overnight to allow all layers to set perfectly.
Q2: Can I use frozen strawberries?
Fresh strawberries are ideal for visual appeal. Frozen berries may release water and make the jelly cloudy.
Q3: What’s the best pan to use?
A springform pan is essential for clean edges and easy release. For individual servings, use silicone molds or mini cake rings.
Q4: How do I avoid cloudy jelly?
Let the gelatin mixture cool to room temperature before pouring. Pour slowly and avoid disturbing the strawberry layer.
Q5: Can I use store-bought sponge cake?
Yes. A pre-baked cake base saves time — just trim to fit your pan size and layer as usual.
Q6: How long does it last in the fridge?
3–4 days in an airtight container. The jelly may begin to loosen after that.
Q7: Is this dessert gluten-free?
Not by default, but you can easily swap the sponge with a gluten-free version.
PrintStrawberry Jelly Cake Recipe That Looks Stunning Every Time
A layered strawberry jelly cake with a light sponge base, creamy middle, and glossy strawberry topping — elegant, refreshing, and visually stunning.
- Prep Time: 35 minutes
- Cook Time: 20 minutes
- Total Time: 5 hours
- Yield: 8–10 slices 1x
Ingredients
Sponge Base:
-
3 eggs
-
½ cup granulated sugar
-
½ cup cake flour
-
1 tsp baking powder
-
1 tsp vanilla extract
-
Pinch of salt
Cream Layer (Optional):
-
8 oz cream cheese or mascarpone
-
¾ cup whipping cream
-
⅓ cup powdered sugar
-
1 tsp vanilla or lemon zest
Strawberry Jelly Topping:
-
1½ cups sliced strawberries
-
1 packet strawberry gelatin (or 2½ tsp plain gelatin + 1½ cups strawberry juice)
-
1 tbsp lemon juice
Instructions
-
Preheat oven to 350°F. Line and prepare an 8″ or 9″ springform pan.
-
Whip eggs and sugar until pale and thick. Gently fold in dry ingredients and vanilla.
-
Bake sponge for 18–20 mins. Cool in pan.
-
Whip cream cheese with sugar and vanilla. Fold in whipped cream. Spread over sponge. Chill 30 mins.
-
Arrange strawberry slices over cream layer.
-
Prepare gelatin and let cool to room temp. Gently pour over fruit.
-
Chill 4+ hours or overnight. Release from pan and serve chilled.
Notes
-
Use clear gelatin with real juice for best flavor.
-
For dairy-free, swap cream layer with coconut cream.
-
Top with mint or edible flowers for visual appeal.