
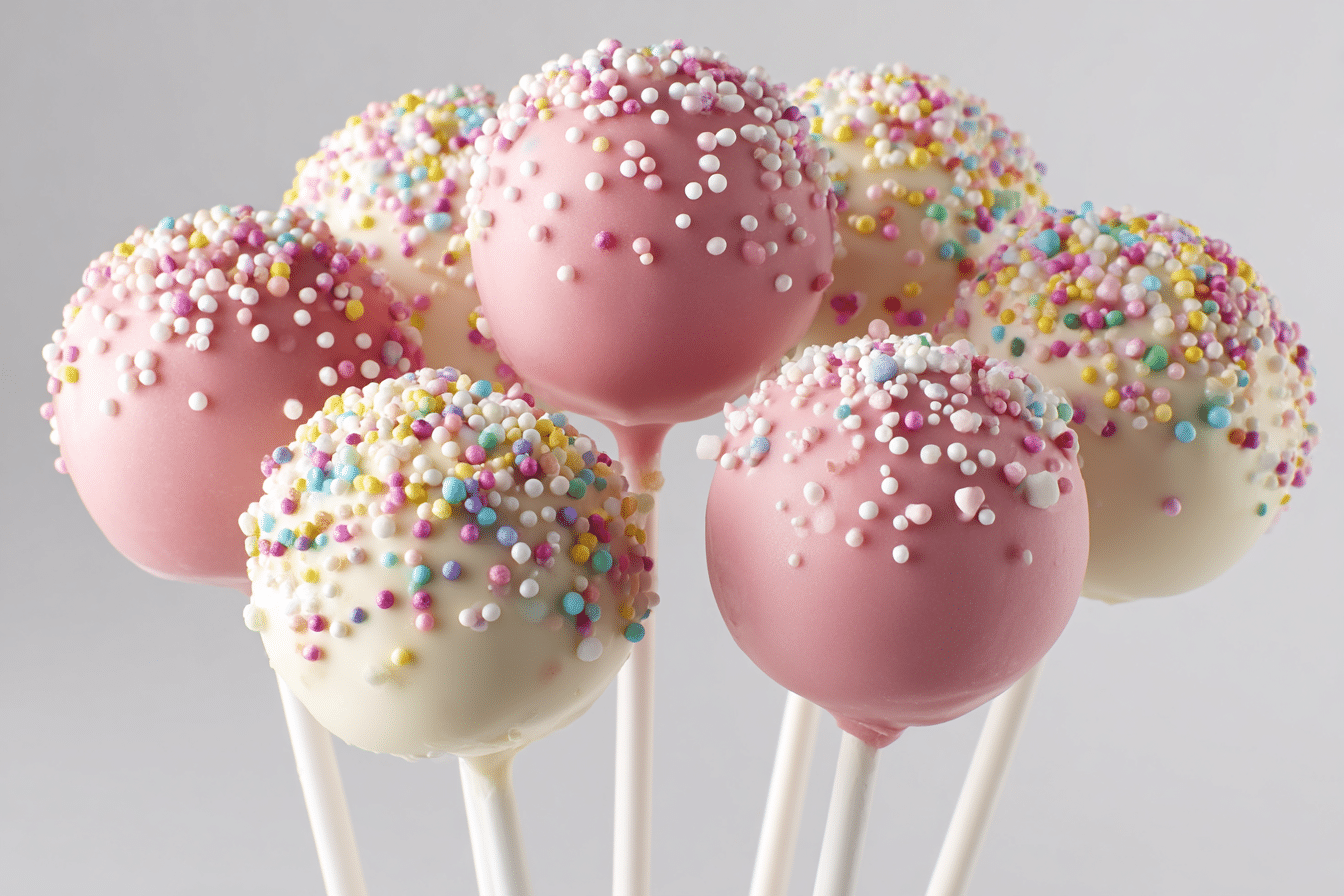
If you’ve ever strolled into Starbucks and couldn’t resist grabbing one of their Birthday Cake Pops, you’re not alone. These pink, sprinkle-covered treats are beloved for their creamy, dough-like center, crisp candy coating, and nostalgic birthday cake flavor. The best part? You can make Starbucks copycat birthday cake pops at home—and they’re even better homemade!
These bite-sized desserts are perfect for birthdays, parties, showers, or just when you’re craving a little indulgence. With the right technique, you’ll get the perfect texture: not too wet, not too crumbly, with that signature pop of vanilla and a candy shell that snaps when you bite in.
Ingredients Overview
Making cake pops at home requires a few basic components: cake, frosting, and coating. Each one matters—here’s how to choose the best.
For the Cake
-
Vanilla or white cake mix: For a classic, soft cake with light crumb. A box mix saves time and works beautifully.
-
Eggs, oil, milk/water: According to the cake mix instructions (milk adds richness).
-
Optional: Butter cake or homemade cake: Offers deeper flavor but takes more time.
Tip: A completely cooled cake is easier to crumble and mix without turning mushy.
For the Frosting
-
Vanilla buttercream frosting: Adds moisture and binds the cake crumbs into a dough. Use just enough—too much makes it gooey.
-
Homemade or store-bought: Either works! Homemade adds flavor; store-bought saves time.
Pro tip: Use room-temperature frosting so it mixes evenly into the cake.
For the Coating
-
Pink candy melts: Create the smooth shell. They melt easily and harden with a nice sheen.
-
Coconut oil or shortening: Helps thin the candy melts for smoother dipping.
-
Sprinkles: Nonpareils or rainbow confetti sprinkles match the Starbucks style.
Alternative: White chocolate chips with food coloring work, but are more temperamental to melt.
Step-by-Step Instructions
1. Bake the Cake
Prepare the cake according to package or homemade recipe instructions. Bake in a 9×13-inch pan. Let it cool completely—no shortcuts here. Warm cake will melt the frosting and ruin the texture.
Once cooled, crumble the cake into fine crumbs in a large bowl using clean hands or a fork.
2. Mix in Frosting
Start with 1/3 cup of frosting, and mix it into the cake crumbs. Use your hands to work it in until the mixture resembles dough—slightly sticky but firm.
Add more frosting 1 tablespoon at a time if the mixture is dry, but don’t overdo it. You want the texture to hold its shape without being greasy or overly moist.
3. Roll into Balls
Scoop about 1.5 tablespoons of the mixture and roll into smooth balls (about the size of a ping pong ball). Place them on a parchment-lined baking sheet.
Once rolled, refrigerate for 2 hours, or freeze for 30 minutes—this helps them firm up for dipping.
4. Insert Sticks
Melt a small amount of the candy melts. Dip the tip of each cake pop stick into the melted coating, then insert it halfway into a chilled cake ball. This helps “glue” the stick in place.
Place back in the fridge for 10–15 minutes to set.
5. Dip & Decorate
Melt the pink candy melts in a tall, narrow container (like a mason jar or mug) with a teaspoon of coconut oil or shortening for a thinner, smoother texture.
Dip each cake pop straight down, then lift and gently swirl to remove excess. Tap lightly on the rim to avoid drips.
Immediately sprinkle with rainbow sprinkles before the coating sets.
Stick cake pops into a foam block or stand upright in a cup with rice to dry fully.
6. Chill & Serve
Let the coating harden completely at room temperature (about 30 minutes), or chill in the fridge for quicker setting.
Serve within 3–4 days or store in an airtight container in the fridge.
Tips, Variations & Substitutions
-
Use gel food coloring: If using white chocolate, color with gel-based dyes to prevent seizing.
-
Add extract: A drop of almond extract or clear vanilla enhances the birthday cake flavor.
-
Make ahead: Cake balls can be frozen (uncoated) for up to 1 month. Thaw before dipping.
-
Switch flavors: Try chocolate cake with chocolate coating, lemon cake with white chocolate, or red velvet with cream cheese frosting.
Serving Ideas & Occasions
-
Birthday parties – A kid-friendly hit with colorful presentation.
-
Baby showers – Customize colors to match the theme.
-
Holiday treats – Use seasonal sprinkles or coatings (red + green, pastel Easter hues).
-
Dessert tables – Easy to grab, no mess, no slicing required.
Serve them upright in a decorated foam block, bouquet-style in a vase, or laid flat on a platter.
Nutritional & Health Notes
Each cake pop is a single portion, making it easier to enjoy in moderation. They’re high in sugar and fat (thanks to frosting and coating), but they’re meant to be a festive treat.
To lighten them slightly:
-
Use Greek yogurt in the frosting.
-
Bake with applesauce instead of oil.
-
Make mini pops with a smaller scoop.
FAQs
Q1: Why are my cake pops falling off the sticks?
A1: The cake balls may be too heavy or not chilled enough. Also, make sure to dip the stick into melted candy before inserting—this acts as glue.
Q2: Can I make cake pops without a cake pop maker?
A2: Yes—this recipe is designed to be made without a cake pop machine. Crumbled cake + frosting + hand-rolled = the classic method.
Q3: Can I use homemade cake?
A3: Definitely. Just make sure it’s fully cooled and not too moist (avoid extra eggs or oil).
Q4: Do cake pops need to be refrigerated?
A4: They don’t have to be if your home is cool, but for longer storage and firmer texture, refrigerate them in an airtight container.
Q5: Why does my candy melt crack after dipping?
A5: Rapid temperature changes can cause cracking. Let cake pops come to room temperature for a few minutes before dipping if they’ve been in the freezer.
Q6: Can I use chocolate instead of candy melts?
A6: Yes, but tempering is key. Candy melts are easier because they’re designed to harden without tempering.
Q7: How do I store leftover cake pops?
A7: Store in the fridge up to 5 days, or freeze (uncoated or coated) for up to a month in an airtight container.
PrintStarbucks Birthday Cake Pops Recipe You Can Make Yourself

These Starbucks-inspired Birthday Cake Pops are rich, creamy, and coated in pink candy with sprinkles. The perfect bite-sized treat for any occasion.
- Prep Time: 30 minutes
- Total Time: 2.5 hours
- Yield: 24 cake pops 1x
Ingredients
-
1 box vanilla or white cake mix (plus ingredients to bake)
-
1/2 cup vanilla frosting (start with 1/3 cup)
-
1 1/2 cups pink candy melts
-
1–2 tsp coconut oil or shortening
-
Sprinkles
-
24 cake pop sticks
Instructions
-
Bake cake and let cool completely. Crumble into fine crumbs.
-
Mix with frosting until dough-like. Start with 1/3 cup and add more as needed.
-
Roll into 1.5 tbsp balls. Chill for 2 hours or freeze 30 mins.
-
Dip sticks in melted candy, insert into balls. Chill again to set.
-
Melt candy melts with coconut oil. Dip cake pops, tap off excess.
-
Add sprinkles immediately. Let set upright or on parchment.
Notes
Store chilled for up to 5 days. Freeze uncoated pops up to 1 month.