
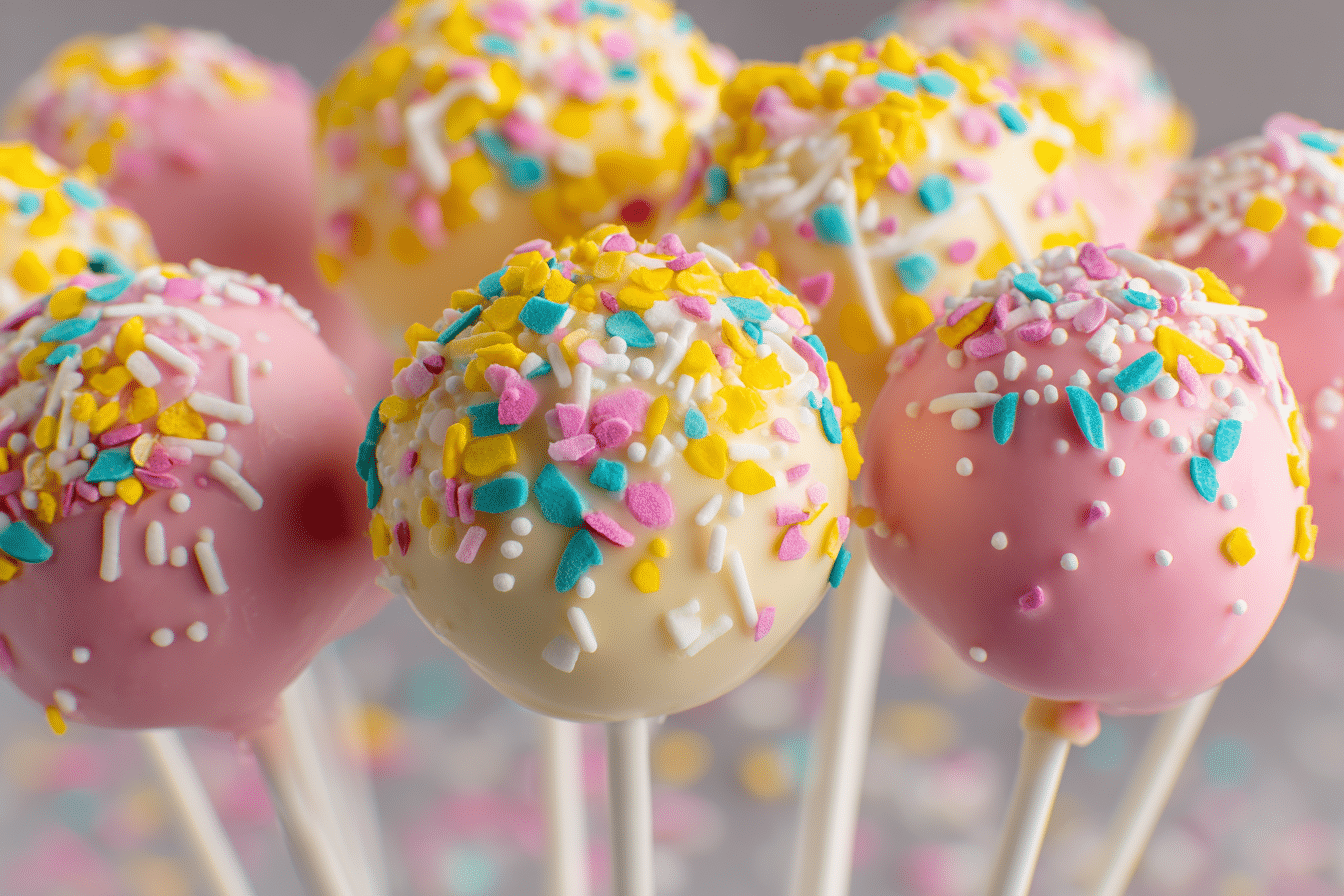
If you’ve ever stood in line at Starbucks and impulsively added a birthday cake pop to your order, you’re not alone. These cheerful little treats are hard to resist—soft, sweet vanilla cake mixed with creamy frosting, dipped in a smooth pink candy coating, and finished with a festive dusting of sprinkles.
Recreating the best Starbucks Copycat Birthday Cake Pops at home is surprisingly easy—and even more delicious. The texture is key: ultra-moist cake crumbs bound with just enough frosting to hold together without becoming soggy. Then comes the signature candy shell: glossy, pink, and with that perfect snap when you bite into it.
These cake pops are ideal for parties, gifting, or simply stashing in the fridge for a bite-sized treat whenever a sweet craving strikes. Whether you’re making them for kids or just for fun, they’re a joyful, hands-on dessert that always brings a smile.
Ingredients Overview
Each element in this cake pop recipe has a specific role in building texture, flavor, and visual appeal.
Vanilla Cake (Homemade or Boxed):
You’ll need a basic vanilla cake, cooled completely before crumbling. A homemade vanilla cake gives the richest flavor, but a quality boxed mix works beautifully if you’re short on time.
Vanilla Frosting:
The glue that holds the cake crumbs together. A thick, creamy vanilla buttercream is best—sweet and rich but not overpowering. If using store-bought, choose one with a firm consistency.
White Candy Melts or Almond Bark:
These form the pink coating. White melts offer a smooth, easy-to-dip finish. Almond bark or white chocolate chips can also work, but may need thinning.
Pink Gel Food Coloring:
Just a drop gives the cake pops their iconic soft pink shell. Avoid liquid food coloring, which can seize melted chocolate.
Vegetable Shortening or Coconut Oil:
A small amount added to the melted candy coating keeps it smooth and dippable. It helps avoid thick, globby shells.
Lollipop Sticks:
Essential for forming true cake pops. Choose 4- to 6-inch sticks made for baking or candy.
Rainbow Sprinkles:
No birthday cake pop is complete without them. Use tiny, classic nonpareils or jimmies for the full Starbucks look.
Step-by-Step Instructions
1. Bake the Cake
Prepare a standard 9×13-inch vanilla cake. Let it cool completely. For boxed mix, follow the package instructions. For homemade, a simple butter-based vanilla cake is perfect.
2. Crumble the Cake
Once fully cooled, break the cake into large chunks and crumble it into a large mixing bowl. Use your hands or a fork until you have fine, even crumbs.
3. Add the Frosting
Start with 1/3 cup of frosting and mix into the crumbs. Add more gradually, 1 tablespoon at a time, until the mixture holds together when pressed. You want a moist, dough-like texture—not sticky or mushy.
4. Form the Balls
Scoop about 1 tablespoon of the mixture and roll into smooth balls. Use a cookie scoop for even sizing. Place them on a parchment-lined tray.
5. Chill the Balls
Refrigerate for 2 hours or freeze for 30–45 minutes. They need to be firm enough to hold their shape during dipping.
6. Melt the Coating
In a microwave-safe bowl, melt white candy melts or almond bark in 30-second intervals, stirring each time. Once fully melted, stir in pink gel food coloring and 1 teaspoon of shortening or coconut oil to thin.
7. Insert the Sticks
Dip the tip of a lollipop stick into the melted candy coating, then insert it halfway into a cake ball. This helps anchor the stick. Let set for 5–10 minutes.
8. Dip and Decorate
Dip each cake pop into the pink candy coating, tilting the bowl and turning the pop to fully coat. Gently tap off excess. Immediately add sprinkles before the coating sets.
9. Let Them Dry
Stick cake pops upright into a block of styrofoam or a cardboard box with small holes. Allow them to set at room temperature for at least 30 minutes, or refrigerate for 10 minutes.
Tips, Variations & Substitutions
Tips for Success:
-
Don’t over-add frosting—start small and build up.
-
Always chill the cake balls before dipping.
-
If the coating is too thick, add more shortening or coconut oil.
-
Use gel-based food coloring to avoid seizing the melted chocolate.
-
Work in batches to keep cake balls chilled while you dip.
Fun Flavor Variations:
-
Chocolate Version: Use chocolate cake and chocolate frosting with white coating.
-
Strawberry Shortcake: Use strawberry cake and cream cheese frosting with pink or white coating.
-
Lemon Cake Pops: Try lemon cake with vanilla glaze and yellow coating.
Substitutions:
-
No Candy Melts? Use white chocolate chips and add 1–2 tsp oil to thin.
-
Vegan Option: Use dairy-free cake and frosting; check labels on candy melts.
-
Gluten-Free: Sub a gluten-free cake mix and use GF frosting and sprinkles.
Serving Ideas & Occasions
Birthday cake pops are party naturals. Their portable, mess-free design makes them perfect for:
-
Birthday parties (obviously!)
-
Baby showers
-
Holiday dessert tables
-
Bake sales
-
Wedding favors or dessert bars
Display them upright in a decorative jar or bouquet-style stand. Serve chilled or at room temperature. For gifting, wrap in cellophane with a ribbon for a polished, professional touch.
Nutritional & Health Notes
These cake pops are a treat in every sense—sweet, rich, and meant to be enjoyed in moderation. Each pop ranges from 130–170 calories, depending on coating and frosting amounts.
You can adjust sweetness by using less frosting or a less sugary cake. Making smaller cake pops (1-teaspoon size) is a fun way to manage portions and still enjoy a few.
Want a more wholesome spin? Use a scratch-made vanilla cake with less sugar, or substitute part of the white flour with almond flour for added texture and flavor.
FAQs
1. Why are my cake pops falling off the stick?
They may be too warm or the coating is too thick. Always chill cake balls and dip the stick in coating before inserting. This helps “glue” it in place.
2. How far in advance can I make them?
You can make cake pops up to 5 days ahead. Store in an airtight container in the fridge. Bring to room temperature before serving for best texture.
3. Can I freeze cake pops?
Yes! Freeze the undecorated cake balls, or fully finished pops (wrapped well). Thaw in the fridge overnight and let sit at room temp before serving.
4. What if my coating is too thick?
Add 1–2 teaspoons of shortening or coconut oil and stir well. This helps the coating become smooth and dippable.
5. Can I use different colors for the coating?
Absolutely. Pink is classic, but pastel blues, yellows, or even metallic candy melts make for stunning variations—especially for themed parties.
6. Do I need a cake pop stand?
No, but it helps. You can also use an upside-down egg carton, a colander, or poke holes in a shoebox to hold the pops upright while drying.
7. How do I make them perfectly round?
Chill the dough well and roll between your palms until smooth. If needed, roll once more after chilling for extra-smooth balls before dipping.
Starbucks Birthday Cake Pops Recipe You Can Make at Home

These Starbucks Copycat Birthday Cake Pops are soft, sweet vanilla cake bites mixed with frosting, dipped in pink candy coating, and topped with sprinkles. Fun, festive, and perfect for any celebration.
- Prep Time: 40 minutes
- Cook Time: 30 minutes (including cake)
- Total Time: 1 hour 10 minutes
- Yield: 20 cake pops 1x
Ingredients
1 box vanilla cake mix (plus ingredients listed) or homemade 9×13 vanilla cake
1/2 to 3/4 cup vanilla frosting
12 oz white candy melts or almond bark
1–2 tsp vegetable shortening or coconut oil
Pink gel food coloring
Lollipop sticks
Rainbow sprinkles
Instructions
1 box vanilla cake mix (plus ingredients listed) or homemade 9×13 vanilla cake
1/2 to 3/4 cup vanilla frosting
12 oz white candy melts or almond bark
1–2 tsp vegetable shortening or coconut oil
Pink gel food coloring
Lollipop sticks
Rainbow sprinkles
Notes
Chill cake balls well before dipping. Use gel coloring only. Adjust frosting amount to avoid soggy texture.