
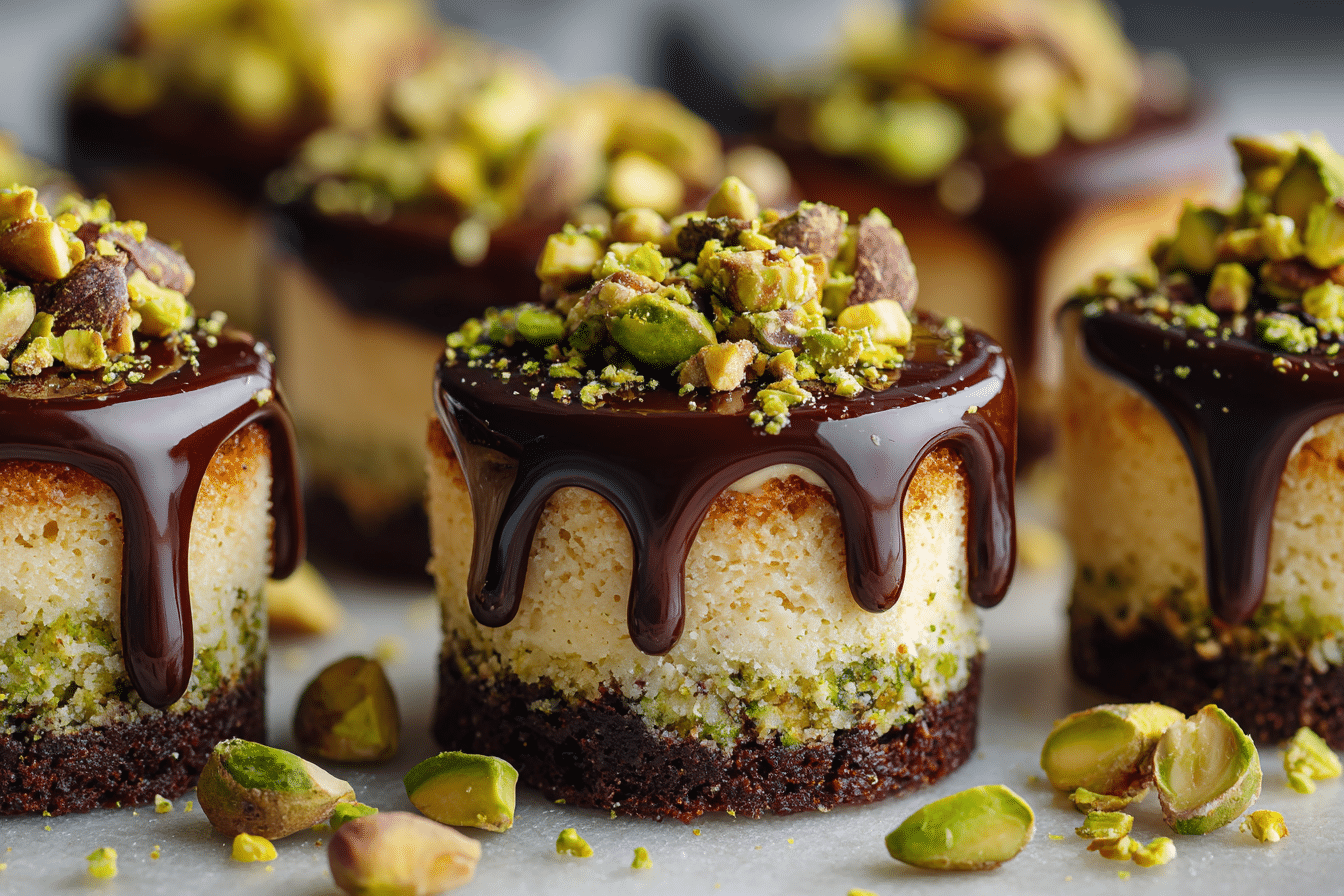
These Pistachio and Coffee Mini Cheesecakes are a dreamy fusion of bold espresso and nutty pistachios — the perfect bite-sized dessert for those who appreciate a touch of sophistication in their sweets.
Combining the creamy indulgence of classic cheesecake with the aromatic intensity of coffee and the buttery crunch of pistachios, these mini treats deliver balanced flavor in every forkful. The pairing of coffee and pistachio, popular in Middle Eastern and Italian confections, adds depth and intrigue, making these cheesecakes as memorable as they are beautiful.
Individually portioned and baked in a muffin tin, they’re ideal for elegant dinner parties, afternoon tea, or any occasion where you want to impress without fuss. Best of all, they’re make-ahead friendly and freeze beautifully.
Ingredients Overview
Every layer of this mini cheesecake recipe brings texture and flavor that work in harmony. Let’s explore each component:
Crust: Pistachio Biscuit Base
-
Pistachios (shelled and unsalted): Ground into a fine meal for a nutty base with natural green color and rich, earthy flavor.
-
Graham crackers or digestive biscuits: Used alongside pistachios to create a balanced, sturdy crust.
-
Butter: Melted to bind the crumbs and add richness.
-
Sugar: Just a touch to balance the saltiness and intensify flavor.
Tip: Toast the pistachios before grinding for a deeper flavor.
Cheesecake Filling: Coffee-Infused Creaminess
-
Cream cheese: Full-fat, brick-style for optimal texture. Softened at room temp for easy mixing.
-
Granulated sugar: Sweetens the filling without overpowering the coffee or pistachio notes.
-
Eggs: Bind the batter while keeping it smooth and silky.
-
Sour cream: Adds light tang and helps prevent cracking.
-
Espresso or strong brewed coffee: Brings bold coffee flavor. Instant espresso powder dissolved in water also works.
-
Vanilla extract: Rounds out the flavors and complements both pistachio and coffee.
Topping (Optional)
-
Chopped pistachios: For a crunchy finish.
-
Espresso whipped cream: A light, creamy topping with a coffee kick.
-
Chocolate shavings: Adds elegance and a touch of bitterness to balance sweetness.
Step-by-Step Instructions
1. Prepare the Crust
Preheat your oven to 325°F (163°C). Line a standard muffin tin with paper liners.
In a food processor, blend:
-
½ cup shelled pistachios
-
¾ cup graham cracker crumbs
-
2 tbsp sugar
-
4 tbsp melted unsalted butter
Pulse until the texture resembles damp sand.
Spoon 1 to 1½ tablespoons of crust mixture into each liner and press down firmly. Bake for 5–6 minutes, then set aside to cool slightly.
2. Make the Coffee Cheesecake Filling
In a large bowl, beat:
-
16 oz (2 blocks) cream cheese, room temperature
-
⅔ cup granulated sugar
Beat until smooth and creamy.
Add:
-
2 eggs, one at a time
-
½ cup sour cream
-
2 tbsp strong espresso or coffee (cooled)
-
1 tsp vanilla extract
Mix on low speed until fully incorporated. Avoid over-mixing to prevent air bubbles.
3. Assemble and Bake
Divide the filling evenly among the prepared crusts, filling each liner nearly to the top.
Tap the tin gently on the counter to release air bubbles.
Bake for 18–22 minutes, until the centers are slightly set but still jiggle gently.
Turn off the oven, crack the door, and let the cheesecakes sit inside for 10 minutes before removing.
Cool completely at room temperature, then refrigerate at least 3 hours or overnight.
4. Add Toppings (Optional)
Before serving, top each mini cheesecake with:
-
A swirl of espresso whipped cream
-
Crushed pistachios
-
A dusting of cocoa or chocolate curls
This adds contrast in color, texture, and flavor.
Tips, Variations & Substitutions
-
No coffee? You can substitute with cocoa powder (1 tbsp) dissolved in water for a mocha version.
-
Pistachio allergy? Use almonds or pecans in the crust instead.
-
Dairy-free option: Use plant-based cream cheese and sour cream. Coconut oil can replace butter in the crust.
-
No espresso machine? Use instant espresso powder or very strong brewed coffee — just make sure it’s cooled before adding.
-
Add a swirl: Drop a small spoonful of pistachio paste or Nutella into the batter and swirl for extra flavor and visual flair.
For a Middle Eastern twist, sprinkle the tops with rose petals or orange blossom water–infused whipped cream.
Serving Ideas & Occasions
These mini cheesecakes are perfect for:
-
Wedding or baby showers – elegant and individually portioned
-
Holiday dessert spreads – unique flavor profile among classics
-
Afternoon coffee dates – pairs beautifully with espresso or chai
-
Gifting – wrapped in cupcake boxes or clear treat bags
-
Meal prep – freeze and thaw for a treat anytime
The nutty base and coffee infusion make them feel special, while the mini size keeps them approachable and easy to serve.
Nutritional & Health Notes
These mini cheesecakes offer rich flavor in small, satisfying portions:
-
Pistachios are a good source of healthy fats and plant protein.
-
Coffee adds antioxidants and depth without adding calories.
-
The small size naturally encourages portion control — about 180–220 calories per cheesecake depending on topping.
To lighten the recipe:
-
Use light cream cheese or swap half with Greek yogurt.
-
Reduce sugar slightly if your espresso is already strong.
-
Opt for low-fat sour cream and skip the whipped topping.
FAQs
Q1: Can I make these ahead of time?
Yes, they store well. Make them 1–2 days in advance and refrigerate in an airtight container. Add toppings just before serving.
Q2: How do I prevent the mini cheesecakes from sinking or cracking?
Avoid overmixing, and don’t overbake. Let them cool gradually, starting in the oven with the door ajar.
Q3: Can I freeze these mini cheesecakes?
Absolutely. Wrap each cooled cheesecake in plastic and freeze for up to 2 months. Thaw in the fridge overnight before serving.
Q4: Can I make these without a crust?
Yes, but the texture will be softer and more pudding-like. Use parchment cupcake liners for easier removal.
Q5: What can I use instead of sour cream?
Plain Greek yogurt works well. You could also use mascarpone for an extra decadent touch.
Q6: Do I need a water bath?
Not for mini cheesecakes. Their smaller size makes even baking possible without a water bath, though cooling gently is still important.
Q7: Can I use pistachio paste in the filling?
Yes — replace 2 tablespoons of sour cream with pistachio paste for a more pronounced nutty flavor and a green tint.
PrintPistachio Coffee Mini Cheesecake Squares – No Bake & Elegant
Creamy, espresso-infused mini cheesecakes with a pistachio-graham crust and optional toppings — rich, nutty, and ideal for elegant occasions.
- Prep Time: 20 minutes
- Cook Time: 22 minutes
- Total Time: 4 hours (includes chilling)
- Yield: 12 mini cheesecakes 1x
Ingredients
Crust:
-
½ cup pistachios, finely ground
-
¾ cup graham cracker crumbs
-
2 tbsp sugar
-
4 tbsp melted butter
Filling:
-
16 oz cream cheese, softened
-
⅔ cup sugar
-
2 eggs
-
½ cup sour cream
-
2 tbsp strong brewed espresso (cooled)
-
1 tsp vanilla extract
Toppings (Optional):
-
Crushed pistachios
-
Whipped cream
-
Chocolate shavings
Instructions
-
Preheat oven to 325°F and line a muffin tin with paper liners.
-
Mix crust ingredients. Press 1½ tbsp into each liner and bake for 6 minutes.
-
Beat cream cheese and sugar until smooth. Add eggs, one at a time. Mix in sour cream, espresso, and vanilla.
-
Divide filling among cups. Bake 18–22 minutes.
-
Cool in oven 10 minutes, then refrigerate 3 hours or overnight.
-
Top with whipped cream and pistachios before serving (optional).
Notes
-
Use Greek yogurt instead of sour cream
-
Instant espresso powder works in place of brewed
-
Freeze well for up to 2 months