

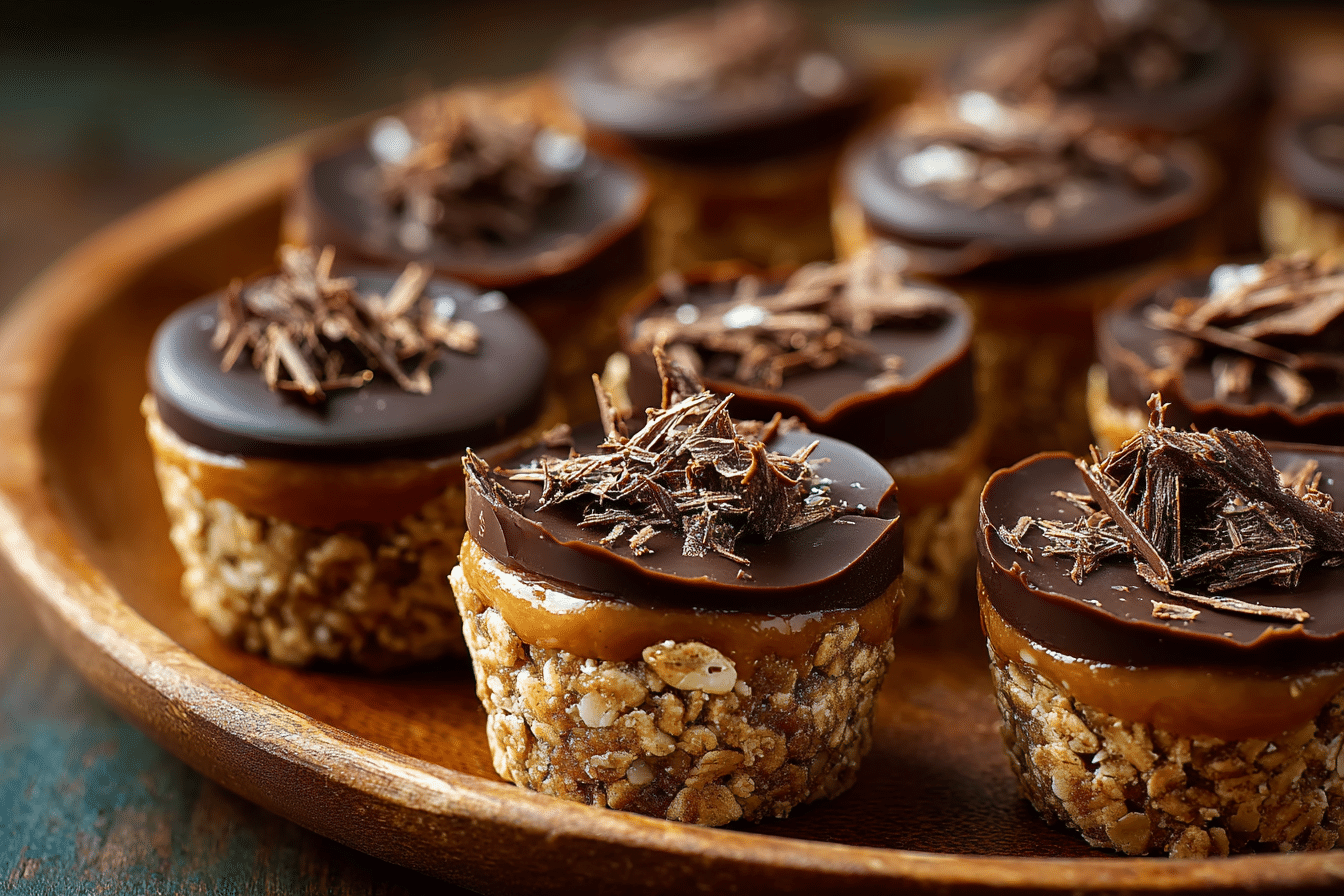
When you’re craving a wholesome, satisfying treat but don’t want to turn on the oven, no bake peanut butter oat cups are a perfect solution. These little bites combine creamy peanut butter, hearty oats, and a touch of natural sweetness to create a deliciously chewy, rich, and slightly nutty snack that’s ready in minutes.
Rooted in the tradition of no-bake desserts that gained popularity in the mid-20th century, these oat cups are a modern, health-conscious spin on classic peanut butter bars. Whether you need a quick afternoon energy boost, a kid-friendly lunchbox snack, or a light dessert, these peanut butter oat cups check all the boxes.
What makes them especially great? They’re freezer-friendly, completely customizable, and made with pantry staples. The rich peanut butter base and hint of honey pair perfectly with the chewy texture of oats and optional dark chocolate topping.
Ingredients Overview
Here’s a closer look at what goes into making no bake peanut butter oat cups and how each ingredient plays a role in texture, flavor, and nutrition.
-
Old-Fashioned Rolled Oats: These oats provide the chewy structure. They’re hearty, nutritious, and hold up well without becoming soggy. If you’re gluten-sensitive, opt for certified gluten-free oats.
-
Peanut Butter: The star of the recipe. Use a natural, creamy peanut butter (just peanuts and salt) for best results. It acts as both the flavor base and the binding agent. Crunchy peanut butter works too for added texture.
-
Honey or Maple Syrup: Adds natural sweetness and helps hold everything together. Maple syrup keeps it vegan, while honey offers a thicker, richer consistency.
-
Coconut Oil: This helps the mixture set when chilled. It also adds a subtle tropical note and smooth texture. If you don’t have coconut oil, butter or a neutral oil like avocado oil can work in a pinch.
-
Vanilla Extract: Enhances the overall flavor with warm, sweet undertones.
-
Dark Chocolate Chips (optional): For topping or mixing in. Melted over the top, they create a crisp layer that balances beautifully with the creamy oats.
-
Sea Salt (optional): A pinch of flaky sea salt on top adds contrast and brings out the richness of the peanut butter and chocolate.
Substitutions & Tips
-
Nut-Free: Swap peanut butter for sunflower seed butter or tahini for a school-safe option.
-
Vegan: Use maple syrup instead of honey, and ensure chocolate chips are dairy-free.
-
Low-Sugar: Use a no-sugar-added peanut butter and reduce sweetener slightly. The oats and chocolate still add flavor.
Freshness tip: Use fresh peanut butter and high-quality oats. If your oats are more than a year old or stored improperly, they can taste stale or musty, which dulls the final flavor.
Step-by-Step Instructions
Making these peanut butter oat cups is simple and doesn’t require baking — just a bit of stovetop melting and chill time.
-
Prepare Your Muffin Tin
Line a 12-cup muffin tin with paper liners or use a silicone mold for easy release. This helps the cups firm up neatly and pop out without sticking. -
Melt the Wet Ingredients
In a medium saucepan over low heat, combine peanut butter, coconut oil, and honey (or maple syrup). Stir constantly until melted and smooth — about 2–3 minutes. You should smell the warm nuttiness of the peanut butter blending with the sweet aroma of honey. -
Add Vanilla and Oats
Remove the pan from heat. Stir in vanilla extract, then pour in the oats. Mix thoroughly until oats are fully coated in the peanut butter mixture. The result should be thick but scoopable. -
Scoop and Press Into Cups
Divide the oat mixture evenly among the muffin cups. Press down with the back of a spoon to compact them slightly — this helps them hold together better when chilled. -
Optional Chocolate Topping
If using chocolate, melt it in a double boiler or microwave in 30-second bursts, stirring between each. Spoon about 1 teaspoon over each cup and smooth it out. Sprinkle with a tiny pinch of flaky sea salt for a gourmet touch. -
Chill Until Set
Place the tray in the refrigerator for 1–2 hours, or until cups are firm to the touch. You can speed this up in the freezer (about 30 minutes), especially in warmer months. -
Serve or Store
Once set, remove from liners and store in an airtight container in the fridge for up to 1 week or freezer for up to 3 months.
Tips, Variations & Substitutions
-
Add Texture: Mix in chopped nuts, seeds, or puffed rice for crunch.
-
Flavor Swaps: Almond butter or cashew butter create a more subtle, slightly sweet variation.
-
Protein Boost: Stir in a scoop of vanilla or unflavored protein powder with the oats.
-
Kid-Friendly: Add mini chocolate chips, shredded coconut, or dried cranberries.
-
Low-Carb: Replace oats with a mix of chopped nuts, coconut flakes, and chia seeds.
-
Holiday Flair: Add a sprinkle of cinnamon or pumpkin spice for seasonal warmth.
These cups are easy to personalize based on what you have in your pantry, making them an ideal go-to recipe for any busy day.
Serving Ideas & Occasions
-
Meal Prep Snacks: Pack them in lunchboxes or grab them on-the-go between meetings.
-
After-School Treat: Kids love their chewy, slightly sweet flavor without being overly sugary.
-
Party Platters: Dress them up with a chocolate drizzle and sea salt for a rustic dessert tray.
-
Holiday Gifting: Wrap a batch in parchment and twine for a thoughtful homemade gift.
-
Breakfast on the Run: Pair with Greek yogurt and fresh fruit for a quick morning boost.
These oat cups offer just enough indulgence to satisfy a craving, while still feeling light and nourishing.
Nutritional & Health Notes
Peanut butter oat cups are a balanced snack option with:
-
Healthy Fats: From natural peanut butter and coconut oil — great for satiety.
-
Complex Carbohydrates: Rolled oats provide sustained energy and fiber.
-
Natural Sweeteners: Maple syrup or honey keep sugar content moderate without refined sugars.
-
Customizable Calories: Depending on portion size and toppings, you can keep them light or more filling.
One standard cup averages around 180–220 calories, depending on chocolate and add-ins. They’re perfect for clean snacking, and portion control is easy thanks to the individual servings.
If you’re following a specific diet, they can be made gluten-free, dairy-free, vegan, or high-protein with simple swaps.
FAQs
Q1: Can I use quick oats instead of rolled oats?
Yes, but quick oats will result in a softer, more crumbly texture. Rolled oats give better structure and chew. If you only have quick oats, reduce the amount slightly and pack the cups more firmly.
Q2: How do I keep them from falling apart?
Ensure the mixture is thoroughly combined and press it firmly into the muffin cups. Chilling until completely firm is crucial. Coconut oil helps them set — don’t skip it.
Q3: What’s the best way to melt chocolate for topping?
Use a double boiler or microwave in short bursts. Stir often to avoid burning. For a smoother topping, add ½ teaspoon of coconut oil to the chocolate before melting.
Q4: Are these freezer-friendly?
Absolutely. Once set, freeze them in a single layer, then transfer to a freezer-safe container. Thaw at room temperature for 15–20 minutes before eating.
Q5: Can I make these sugar-free?
Yes. Use a sugar-free peanut butter and a monk fruit or stevia-based syrup instead of honey or maple syrup. Be sure to use sugar-free chocolate if adding a topping.
Q6: What other nut butters can I use?
Almond, cashew, and sunflower seed butters all work well. Each brings its own unique flavor — almond is mellow, cashew is slightly sweet, and sunflower is nutty and earthy.
Q7: How long do they last?
They last up to 1 week in the fridge and 3 months in the freezer. Keep them in an airtight container to prevent drying out or absorbing fridge odors.
HEALTHY PEANUT BUTTER OAT CUPS – EASY NO BAKE SNACK
Chewy, nutty, and naturally sweetened, these no bake peanut butter oat cups are an easy, healthy snack you can make in under 15 minutes — no oven required.
- Prep Time: 15 minutes + chill
- Cook Time: 5 minutes + chill
- Total Time: 15 minutes + chill
- Yield: 12 cups 1x
INGREDIENTS
-
2 cups rolled oats
-
1 cup creamy natural peanut butter
-
¼ cup coconut oil
-
⅓ cup honey or maple syrup
-
1 tsp vanilla extract
-
½ cup dark chocolate chips (optional)
-
Pinch of sea salt (optional)
INSTRUCTIONS
-
Line a muffin tin with 12 liners or use a silicone mold.
-
In a saucepan over low heat, melt peanut butter, coconut oil, and honey/maple syrup.
-
Remove from heat, stir in vanilla, then mix in oats until fully coated.
-
Scoop mixture into muffin cups and press down gently.
-
Melt chocolate chips and spoon over each cup (optional), sprinkle with sea salt.
-
Chill in fridge for 1–2 hours or freeze for 30 minutes until firm.
-
Store in airtight container in fridge or freezer.
NOTES
-
Use gluten-free oats if needed.
-
Swap peanut butter for almond or sunflower butter.
-
Add mix-ins like chopped nuts or dried fruit for variety.