
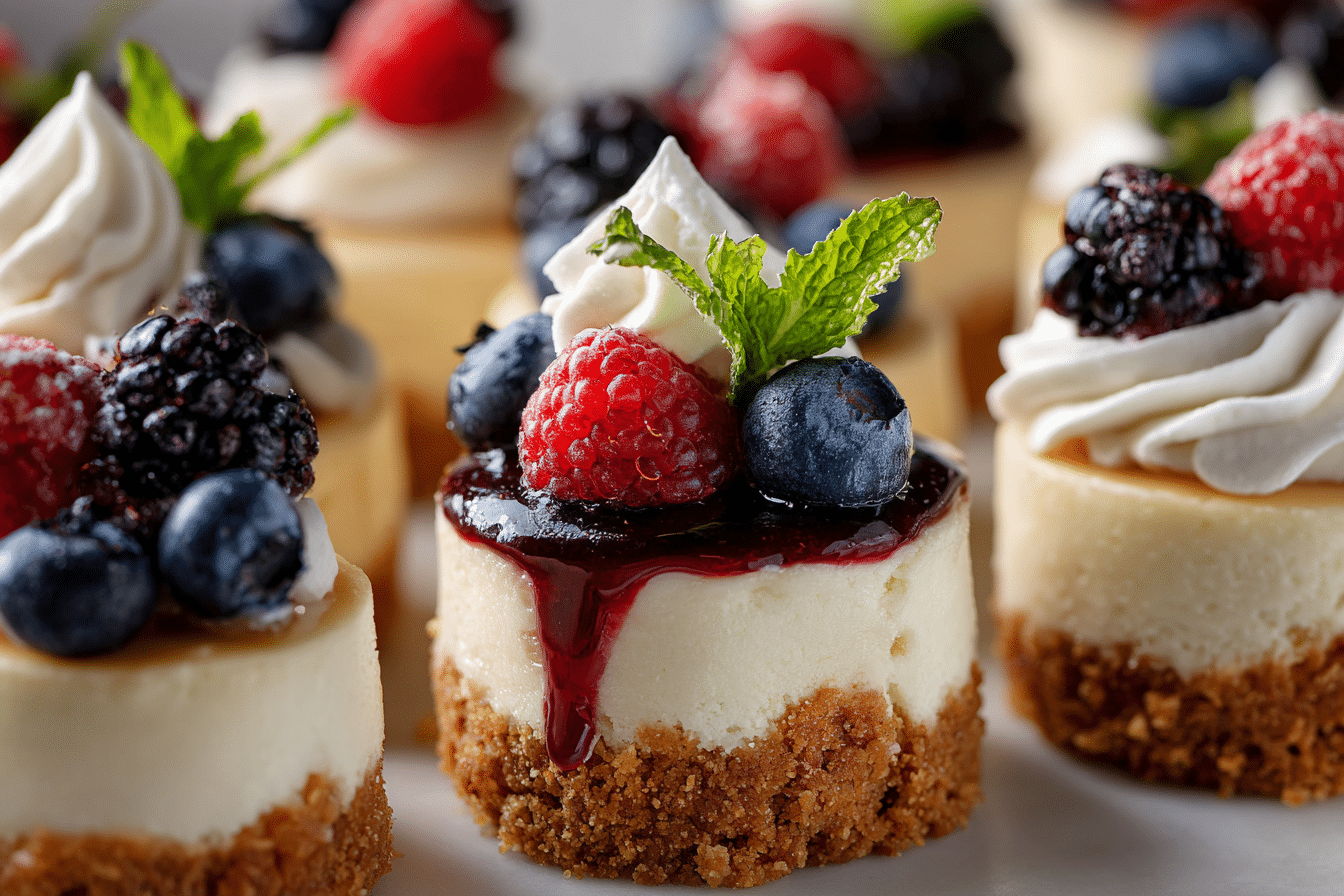
Mini cheesecakes are the ultimate dessert when you want something creamy, indulgent, and perfectly portioned. These Easy Mini Cheesecakes are baked in muffin tins, making them simple to prepare, serve, and transport—no springform pan or water bath needed.
With a classic graham cracker crust and velvety smooth cheesecake filling, they’re just the right size for a satisfying sweet bite. Whether topped with fruit, chocolate, or caramel, these little treats bring big flavor to any gathering.
Ideal for holidays, birthdays, showers, or meal prep desserts, mini cheesecakes offer all the satisfaction of traditional cheesecake with a fraction of the effort.
Ingredients Overview
Mini cheesecakes rely on a handful of pantry and fridge staples, but the quality of these ingredients makes all the difference. Here’s what goes into the perfect batch:
Cream Cheese
The star of the show. Use full-fat, brick-style cream cheese for the smoothest, richest texture.
Tip: Make sure it’s fully softened before mixing to avoid lumps.
Granulated Sugar
Balances the tang of the cream cheese and adds just the right amount of sweetness.
Eggs
Help the cheesecakes set and give them structure. Use room temperature eggs for better blending.
Note: Don’t overmix once the eggs are added—this prevents cracks from forming while baking.
Sour Cream or Greek Yogurt
Adds a touch of tang and helps create that ultra-creamy consistency. Greek yogurt is a great alternative if you’re out of sour cream.
Vanilla Extract
Classic flavor enhancer. Adds depth and balances the richness of the cream cheese.
Graham Cracker Crumbs
These form the buttery base for each mini cheesecake. You can use store-bought crumbs or crush full graham crackers.
Alternative: Try crushed digestive biscuits, Biscoff cookies, or chocolate wafers for a flavor twist.
Melted Butter
Binds the graham cracker crumbs into a firm crust and adds rich flavor.
Optional Toppings
Fresh berries, fruit preserves, lemon curd, melted chocolate, or whipped cream. The options are endless depending on the occasion or craving.
Step-by-Step Instructions
1. Preheat and Prepare the Pan
Preheat your oven to 325°F (163°C). Line a muffin tin with paper liners for easy removal. You can also use silicone muffin molds.
2. Make the Graham Cracker Crust
In a bowl, mix graham cracker crumbs with melted butter and a pinch of sugar. It should have the texture of wet sand.
Spoon about 1 to 1½ tablespoons of crust mixture into each muffin liner. Press it down firmly using the bottom of a small glass or spoon.
Bake for 5 minutes to set the crust. Remove and let cool slightly while you prepare the filling.
3. Prepare the Cheesecake Batter
Using a hand mixer or stand mixer, beat the softened cream cheese until smooth and creamy. Add the sugar and beat again until combined and fluffy.
Add sour cream (or Greek yogurt) and vanilla extract. Mix until just incorporated.
Add eggs one at a time, beating on low speed. Scrape down the sides of the bowl to ensure even mixing, but avoid overbeating.
4. Fill the Cups and Bake
Spoon or pour the cheesecake mixture into each liner, filling almost to the top.
Bake for 16–20 minutes, or until the centers are set but still slightly jiggly. Don’t overbake—residual heat will continue cooking them after removal.
Cool the cheesecakes in the pan for 10–15 minutes, then transfer to a wire rack. Once at room temperature, chill in the fridge for at least 2 hours (overnight is even better).
5. Add Toppings and Serve
Once chilled and firm, remove paper liners and add your favorite toppings. For a fresh finish, top with a single raspberry or blueberry. For a more decadent dessert, drizzle with caramel or ganache.
Tips, Variations & Substitutions
-
Make it gluten-free: Use gluten-free graham crackers or almond flour as the crust base.
-
Add a swirl: Drop a spoonful of raspberry jam or Nutella on top of the batter before baking. Use a toothpick to swirl.
-
Use different crusts: Try crushed Oreos, shortbread, or pretzels for fun flavor and texture.
-
Add citrus zest: Lemon or orange zest brightens the cheesecake and adds a fresh aroma.
-
Mini tart pans: For more elegant presentation, use mini tart pans with removable bottoms.
-
Flavor variations: Add 1–2 tbsp of peanut butter, cocoa powder, or espresso powder to the filling for a twist.
Serving Ideas & Occasions
These mini cheesecakes are perfect for:
-
Holiday dessert trays: Add a festive topping to match the season.
-
Birthday parties: Serve with colorful sprinkles or candies.
-
Weddings and showers: Elegant and mess-free when displayed on tiered trays.
-
Picnics and potlucks: Portable and sturdy, they travel well and stay fresh.
-
Everyday cravings: Keep a batch in the fridge for quick desserts during the week.
Pair with hot coffee, berry tea, or even a sparkling wine for a classy treat.
Nutritional & Health Notes
These mini cheesecakes are portion-controlled by design. Each one contains about 150–200 calories depending on crust and toppings. They’re lower in sugar than many full-size desserts and offer:
-
Protein from cream cheese and eggs
-
Healthy fats from the dairy
-
Moderate carbs from the crust
For lighter options, use reduced-fat cream cheese and Greek yogurt, and skip sugary toppings. You can also make them in mini muffin tins for bite-sized versions with under 100 calories each.
FAQs
Q1: Can I make mini cheesecakes ahead of time?
A1: Absolutely. They’re best when chilled overnight, so making them a day ahead works perfectly. Add fresh toppings just before serving.
Q2: Do I need a water bath for baking?
A2: No, one of the best things about mini cheesecakes is that they bake evenly in a muffin tin without the need for a water bath.
Q3: Can I freeze mini cheesecakes?
A3: Yes! Once fully cooled, wrap individually and freeze for up to 2 months. Thaw in the refrigerator before serving.
Q4: Why did my cheesecakes crack?
A4: Overmixing the batter or overbaking can cause cracks. Be gentle with the eggs and bake until just set.
Q5: Can I make these without cupcake liners?
A5: You can, but use a well-greased nonstick muffin tin or silicone molds for easy removal. Liners make cleanup and serving easier.
Q6: How do I store leftovers?
A6: Keep them in an airtight container in the fridge for up to 5 days. Add toppings just before serving for best freshness.
Q7: Can I make them without a crust?
A7: Yes! For a crustless version, simply bake the filling directly in the muffin cups. Line with parchment or use silicone molds to prevent sticking.
GOURMET MINI CHEESECAKES – SIMPLE RECIPE FOR ELEGANT DESSERT BITES
These easy mini cheesecakes are creamy, smooth, and baked in muffin tins for the perfect individual dessert. Customize with your favorite toppings for any occasion.
- Prep Time: 15 minutes
- Cook Time: 20 minutes
- Total Time: 2 hours 35 minutes (includes chilling)
- Yield: 12 mini cheesecakes 1x
INGREDIENTS
-
1 cup graham cracker crumbs
-
3 tbsp melted butter
-
2 (8 oz) blocks cream cheese, softened
-
2/3 cup granulated sugar
-
2 large eggs
-
1/4 cup sour cream or Greek yogurt
-
1 tsp vanilla extract
-
Optional toppings: fresh fruit, chocolate, caramel, whipped cream
INSTRUCTIONS
-
Preheat oven to 325°F (163°C). Line a muffin tin with paper liners.
-
Mix graham cracker crumbs and melted butter. Press into liners to form crusts.
-
Bake crusts for 5 minutes. Cool slightly.
-
Beat cream cheese until smooth. Add sugar, then sour cream and vanilla.
-
Add eggs one at a time, mixing on low until just combined.
-
Fill liners with batter. Bake 16–20 minutes until centers are set.
-
Cool in pan 10 minutes, then chill in fridge at least 2 hours.
-
Add toppings before serving.
NOTES
-
For richer flavor, chill overnight.
-
Try citrus zest, swirls, or alternate crusts.
-
Freeze without toppings for up to 2 months