
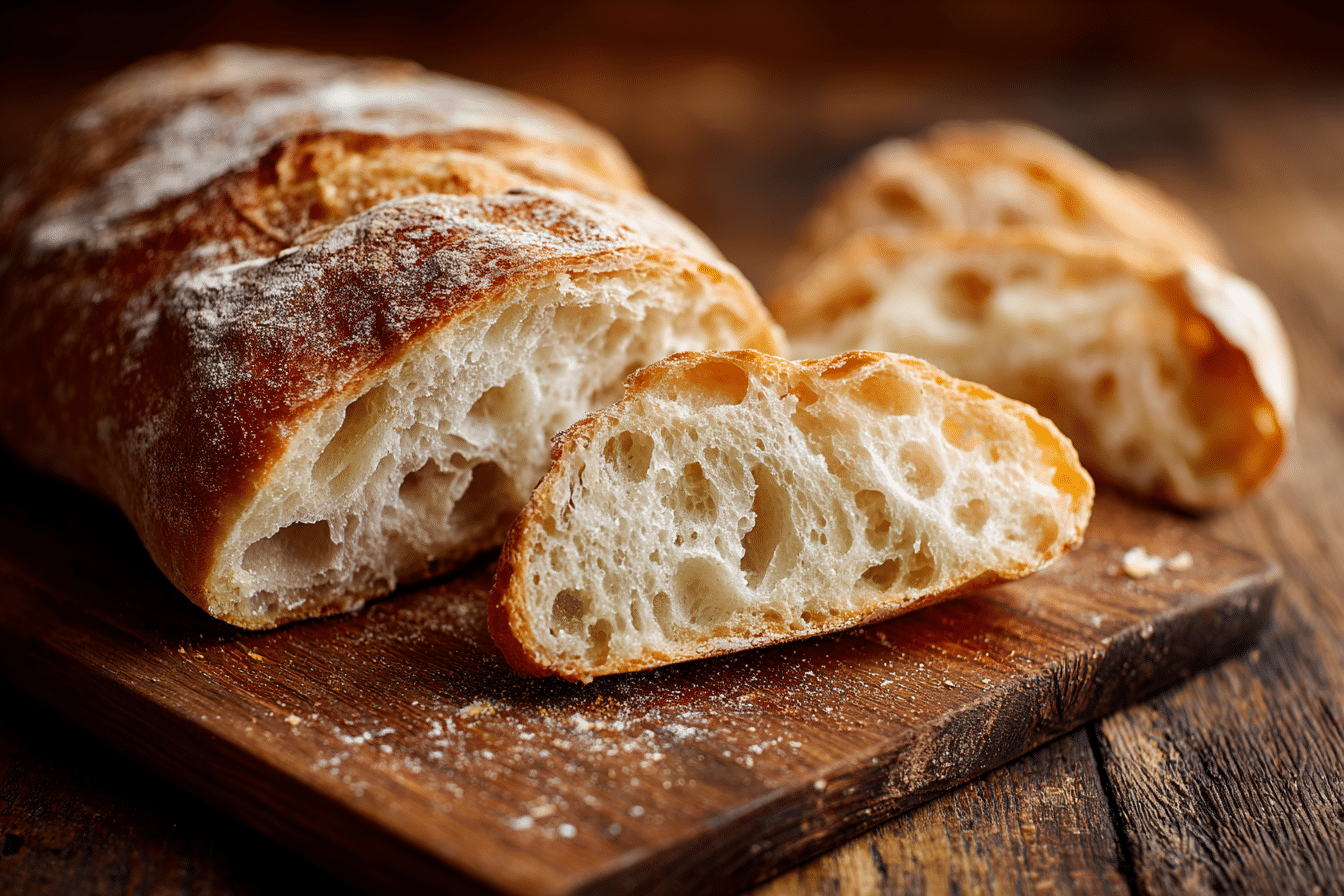
Few breads feel as rustic and satisfying as a freshly baked ciabatta — all crispy crust and light, open crumb. With this no-knead ciabatta recipe, you can achieve that same artisan texture right from your home oven, without the need for a stand mixer or hours of elbow grease.
Originating in Italy in the 1980s, ciabatta means “slipper” in Italian, named for its flat, elongated shape. This version keeps the process refreshingly simple, relying on time and hydration to develop flavor and structure.
The result is a golden, crackly crust with a soft, chewy interior that’s full of irregular holes — perfect for sandwiches, olive oil dipping, or just tearing into warm from the oven.
Ingredients Overview
This no-knead ciabatta leans on just a few pantry staples, but each plays a key role in texture and flavor. Here’s what you’ll need and why:
-
Bread flour: Higher protein than all-purpose, bread flour creates the gluten structure needed for those iconic open pockets. For best results, use unbleached bread flour. You can use all-purpose in a pinch, but expect a slightly less lofty rise.
-
Water: Hydration is crucial here. The high water content (over 75%) gives the dough its slack, sticky character — key to developing large air pockets during fermentation. Use filtered water if possible.
-
Instant yeast: A small amount goes a long way due to the long fermentation. Instant (or rapid-rise) yeast doesn’t need proofing and blends right in with the dry ingredients.
-
Salt: Just enough to enhance flavor without interfering with yeast activity. Use fine sea salt for easy dispersion.
Optional add-ins or variations:
-
Swap in 10–15% whole wheat flour for a nuttier flavor.
-
Stir in chopped olives, roasted garlic, or herbs during the final stretch-and-fold for a flavor twist.
-
To make it gluten-free, use a dedicated GF ciabatta blend — results will vary, but some blends perform well with no-knead methods.
Ingredient quality tips:
-
Stick with fresh yeast — if your packet is older than 6 months, test its activity first.
-
Weigh your flour and water for accuracy. The wet dough is key to the airy crumb, and even a small mismeasurement can shift the balance.
Step-by-Step Instructions
This no-knead dough relies on time and gentle folds to develop gluten. Plan ahead — while the hands-on time is minimal, the process spans about 18–24 hours.
1. Mix the Dough
In a large mixing bowl, combine:
-
500g bread flour
-
1½ tsp salt
-
¼ tsp instant yeast
-
400ml (1 ⅔ cups) lukewarm water
Use a wooden spoon or your hand to stir until no dry spots remain. The dough will be shaggy and very sticky — that’s perfect.
2. Initial Rise (12–18 hours)
Cover the bowl with plastic wrap or a damp towel and let rest at room temperature (around 70°F / 21°C) for 12–18 hours. By morning, the dough should be bubbly, doubled, and jiggly.
3. Stretch and Fold
Dust a clean surface generously with flour. Use a spatula to gently scrape the dough out. With floured hands, lift and fold each side of the dough toward the center — north, south, east, west — then flip it seam-side down.
Let it rest for 20 minutes, uncovered. This gentle folding helps build strength while preserving the airy structure.
4. Shape the Dough
Lightly flour a piece of parchment paper. Cut the dough into two equal pieces with a bench scraper. Handle gently — don’t punch down or knead.
Shape each piece into a rough rectangle or slipper shape, then dust the tops lightly with flour. Cover with a clean kitchen towel and let rise another 45–60 minutes.
5. Preheat the Oven
Place a baking stone or steel in the center of the oven and a cast iron skillet on the bottom rack. Preheat to 475°F (245°C) at least 30 minutes before baking.
6. Bake with Steam
Slide the parchment and dough onto the hot stone or baking sheet. Pour 1 cup of hot water into the skillet below and quickly close the oven door.
Bake for 20–25 minutes until deep golden and the loaves sound hollow when tapped.
Let cool on a rack at least 30 minutes before slicing. The crumb continues to set as it cools.
Tips, Variations & Substitutions
-
Hydration is key: The dough will feel wetter than typical bread dough — resist the urge to add flour. Wet dough = open crumb.
-
Don’t skip the steam: Adding water to a hot pan creates steam that helps the crust expand and crisp.
-
Cold fermentation option: For even more flavor, refrigerate the dough after the initial 1-hour rest. Let it ferment in the fridge for up to 24 hours before shaping.
-
Ciabatta rolls: Divide dough into 6–8 smaller rectangles and bake for 15–18 minutes. Perfect for sandwiches.
-
Dairy-free or vegan? This recipe already is!
-
Herb variation: Add 1 tsp chopped rosemary or thyme during the folding stage for an herbed loaf.
Serving Ideas & Occasions
This no-knead ciabatta fits beautifully into both casual and elegant meals. Here’s how to enjoy it:
-
Dip it in fruity olive oil with a pinch of sea salt and cracked pepper.
-
Slice it open and stuff with Italian deli meats, fresh mozzarella, and basil for a classic panino.
-
Serve alongside tomato soup, lentil stew, or creamy chowders for dunking.
-
Grill it for crostini, bruschetta, or garlic bread at your next gathering.
-
Tear and share during family dinners, holiday spreads, or summer picnics.
Its chewy interior and crisp crust make it ideal for both soaking up sauces and standing alone with a smear of butter.
Nutritional & Health Notes
While ciabatta isn’t a low-carb bread, it offers a satisfying balance of carbs and protein — especially when paired with healthy fats or lean proteins.
Each slice (depending on size) offers around:
-
120–150 calories
-
3–4g protein
-
1g fat
-
25–30g carbohydrates
To make it part of a balanced meal:
-
Pair with lean meats, legumes, or eggs for protein.
-
Add avocado, olive oil, or nut butters for heart-healthy fats.
-
Serve with salads or veggie-based soups for extra fiber and vitamins.
Portion control is easy — the airy crumb feels indulgent but is surprisingly light.
FAQs
Q1: Can I use all-purpose flour instead of bread flour?
Yes, though your crumb may be a bit less open and chewy. Bread flour’s higher protein helps create stronger gluten strands, giving the loaf better structure. If using all-purpose, reduce the water slightly and expect a softer crust.
Q2: How do I know when my ciabatta is fully baked?
The crust should be deep golden with a hollow sound when tapped. An internal temperature of 200–205°F (93–96°C) ensures it’s cooked through. Letting it cool fully helps set the crumb.
Q3: Why is my dough so sticky?
High hydration is the hallmark of ciabatta. Sticky dough is expected and essential for the open texture. Use floured hands and tools, but don’t add extra flour to the dough itself.
Q4: Can I refrigerate the dough overnight?
Absolutely. After the first mix, let it rest for 1 hour, then refrigerate up to 24 hours. Bring to room temp before shaping. Cold fermentation boosts flavor.
Q5: What if I don’t have a baking stone?
Use an inverted baking sheet or a heavy-duty baking pan preheated in the oven. A cast iron skillet works too. Just be sure it’s hot when you add the dough.
Q6: Can I freeze ciabatta?
Yes! Wrap loaves tightly once cooled and freeze for up to 3 months. Reheat in a 350°F oven for 10–12 minutes until warmed through and crusty again.
Q7: Why did my ciabatta turn out flat?
This could be from over-proofing, not enough strength in the dough (skip folding), or rough handling during shaping. Next time, gently stretch and fold, and avoid deflating the dough.
Easy No-Knead Ciabatta for Friday Night Food Ideas
A rustic no-knead ciabatta with a chewy, airy crumb and crisp golden crust — perfect for sandwiches, dipping, or soups.
- Prep Time: 10 minutes (plus rise time)
- Cook Time: 25 minutes
- Total Time: 20–24 hours
- Yield: 2 medium loaves 1x
Ingredients
-
500g bread flour (about 3¾ cups)
-
1½ tsp fine sea salt
-
¼ tsp instant yeast
-
400ml (1 ⅔ cups) lukewarm water
-
Extra flour for dusting
Instructions
-
In a large bowl, mix flour, salt, and yeast. Add water and stir until a sticky dough forms.
-
Cover and let rise at room temperature for 12–18 hours until bubbly and doubled.
-
Turn dough out onto floured surface. Stretch and fold each side toward center. Rest 20 minutes.
-
Divide into 2 equal portions. Shape into slipper loaves on parchment. Dust tops with flour and rest 45–60 minutes.
-
Preheat oven to 475°F with baking stone and cast iron skillet.
-
Transfer loaves on parchment to the hot stone. Add 1 cup hot water to skillet below.
-
Bake 20–25 minutes until golden and crusty. Cool before slicing.
Notes
For extra flavor, refrigerate dough after the first hour. Add herbs or olives during the folding stage. Freeze leftovers once fully cooled.