
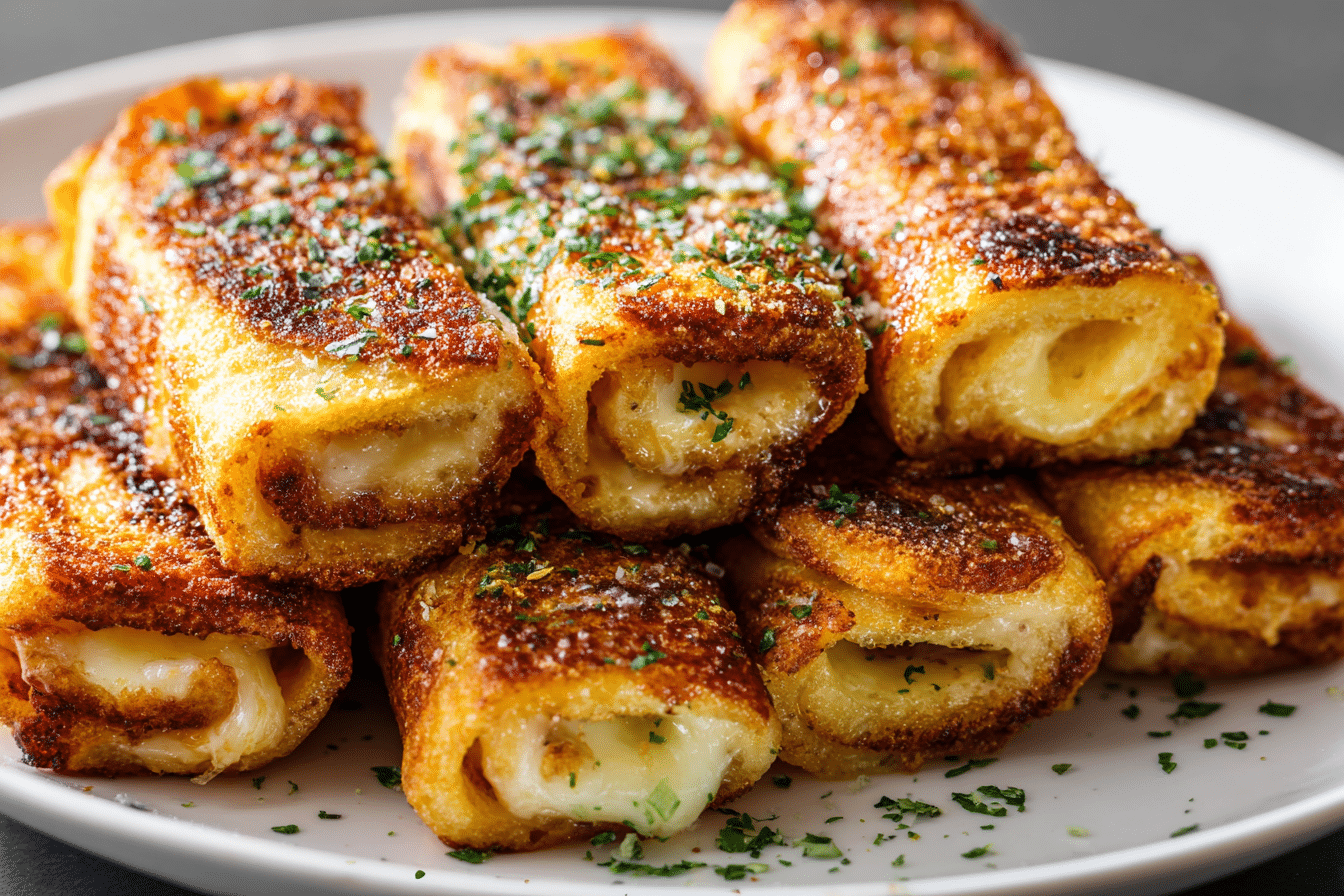
Grilled Cheese Roll-Ups are a playful and fun twist on the classic comfort food, turning traditional sandwiches into bite-sized, crispy, and melty treats. Perfect for snacks, lunches, or quick dinners, these roll-ups are easy to customize with your favorite cheeses, herbs, and even a touch of extras like ham, bacon, or tomato. They’re crunchy on the outside and satisfyingly gooey on the inside, making them a hit with both kids and adults.
The beauty of Grilled Cheese Roll-Ups is in their simplicity and versatility. By using sliced bread, cheese, and minimal additional ingredients, you can create a variety of flavors in just minutes. Rolling the bread ensures every bite contains a perfect balance of crispy crust and melted cheese. Whether served with dipping sauces like marinara, ranch, or a creamy mustard, these roll-ups elevate ordinary grilled cheese into a fun, shareable snack.
Ingredients Overview
The base is simple: sliced sandwich bread and your choice of cheese. Cheddar, mozzarella, or a blend of cheeses melt beautifully, creating the gooey interior that makes these roll-ups irresistible. Optional additions like thinly sliced deli meats, herbs, or a pinch of garlic powder enhance flavor without overwhelming the simplicity of the snack.
Butter or olive oil ensures the outside browns evenly, creating a crispy texture while locking in the cheese inside. Dipping sauces, from marinara to spicy aioli, can transform these roll-ups into a party-ready appetizer. Bread type is flexible: white, whole wheat, or sandwich-style bread works best. Removing the crust allows for easy rolling and ensures a uniform bite.
Substitutions are straightforward: dairy-free cheeses, plant-based butter, or gluten-free bread can make this recipe suitable for various dietary needs. The ingredients combine to create a snack that is crispy, cheesy, and endlessly customizable.
Ingredients
8 slices sandwich bread, crusts removed
8 ounces cheddar cheese, cut into strips or shredded
2 tablespoons butter, softened
Optional: 4 slices deli ham or turkey, cut to fit bread
Optional: 1/2 teaspoon garlic powder
Optional: 1 teaspoon fresh herbs (parsley, basil, or chives)
Optional: dipping sauces such as marinara, ranch, or honey mustard
Step-by-Step Instructions
Begin by preparing the bread slices. Remove the crusts for easier rolling. Using a rolling pin, flatten each slice to approximately 1/4-inch thickness. This helps the bread wrap around the cheese evenly without tearing.
Place cheese strips or shredded cheese in the center of each flattened slice. If using deli meat or herbs, add them over the cheese. Sprinkle garlic powder or seasonings if desired. Roll the bread tightly around the filling, tucking in the ends to prevent cheese from escaping during cooking.
Heat a skillet over medium heat and melt 1 tablespoon of butter. Place the roll-ups seam-side down in the skillet. Cook for 2–3 minutes per side, pressing gently with a spatula, until golden brown and crispy. Add remaining butter and continue cooking until all sides are browned and cheese is melted.
Remove from the skillet and allow to cool slightly before cutting into bite-sized pieces. Serve immediately with dipping sauces of your choice. Common mistakes include overfilling the roll-ups, which can cause cheese to leak, or cooking at too high heat, which may burn the bread before the cheese melts.
Tips, Variations & Substitutions
For a more decadent version, mix cheeses such as cheddar and mozzarella or add a slice of brie for extra creaminess. Spread a thin layer of mustard or pesto on the bread before rolling to add depth of flavor. Sprinkle sesame seeds or parmesan on the outside for added texture.
For dietary substitutions, use plant-based cheese and butter or gluten-free bread. Mini versions are perfect for kids or party appetizers. Experiment with fillings: sautéed mushrooms, caramelized onions, or roasted red peppers work beautifully.
Reheating is best done in a skillet or air fryer to maintain crispiness. Avoid microwaving, as it can make the bread soggy.
Serving Ideas & Occasions
Grilled Cheese Roll-Ups are perfect for school lunches, afternoon snacks, movie nights, or game-day appetizers. Serve alongside fresh vegetables, a bowl of soup, or a small salad for a complete meal.
These roll-ups are ideal for parties, as they are easy to eat with fingers and customizable for different taste preferences. Pair with tomato soup for a classic combo or offer a variety of dipping sauces for a fun snack table presentation.
Nutritional & Health Notes
This snack provides carbohydrates from bread and protein and calcium from cheese. Adding deli meat increases protein content. Using whole-grain bread can add fiber and additional nutrients.
Moderate butter ensures the outside crisps without excessive fat, while optional vegetables and herbs boost vitamins and minerals. Portion control helps keep this indulgent snack balanced within a meal plan. Choosing low-sodium cheese or lean meats can also reduce sodium intake while maintaining flavor.
Grilled Cheese Roll-Ups are an easy, satisfying treat that balances indulgence with simple nutrition, making them an enjoyable snack for all ages.
FAQs
Can I make these ahead of time?
Yes, assemble roll-ups and store in the refrigerator for up to 4 hours before cooking. Cook just before serving to maintain crispiness.
Can I use different cheeses?
Absolutely. Cheddar, mozzarella, Monterey Jack, or a mix all work well. Softer cheeses may require careful handling to prevent leakage.
Can I freeze uncooked roll-ups?
Yes, roll-ups can be frozen uncooked in a single layer on a tray, then transferred to a freezer bag. Cook from frozen, adding a minute or two to the skillet time.
How do I prevent cheese from leaking?
Flatten the bread evenly, avoid overfilling, and roll tightly. Press seam-side down in the skillet first to seal.
Can I make them vegan?
Use plant-based cheese and butter, and choose vegan bread. The texture and flavor remain satisfying.
What dipping sauces work best?
Tomato marinara, ranch, honey mustard, or pesto all complement the cheesy flavor beautifully.
Can I bake instead of skillet-cooking?
Yes, preheat oven to 375°F and bake on a parchment-lined tray for 12–15 minutes, flipping halfway until golden and melted.
PrintCrispy Grilled Cheese Roll-Ups Kids Will Love
Bite-sized grilled cheese sandwiches rolled and pan-fried until golden and melty, perfect for snacks or lunch.
- Prep Time: 10 minutes
- Cook Time: 6–8 minutes
- Total Time: 4 servings (2 roll-ups each)
- Yield: 320 per serving 1x
Ingredients
8 slices sandwich bread, crusts removed
8 ounces cheddar cheese, cut into strips or shredded
2 tablespoons butter, softened
Optional: 4 slices deli ham or turkey
Optional: 1/2 teaspoon garlic powder
Optional: 1 teaspoon fresh herbs
Optional: dipping sauces such as marinara, ranch, or honey mustard
Instructions
-
Flatten bread slices with rolling pin.
-
Place cheese and optional fillings on bread, roll tightly.
-
Heat skillet with 1 tbsp butter, cook roll-ups seam-side down 2–3 minutes per side until golden.
-
Add remaining butter, cook until all sides are browned and cheese melted.
-
Serve warm with dipping sauces.
Notes
Avoid overfilling to prevent cheese leakage; reheat in skillet or air fryer for crispiness.