
A true British classic, Chocolate Fridge Cake is the kind of indulgent, no-bake dessert that’s equal parts nostalgic and decadent. This version is inspired by Jamie Oliver, who has a way of turning humble ingredients into something extraordinary.
Fridge cake, also known as tiffin, is made by melting chocolate with butter and syrup, then stirring in crushed biscuits, dried fruit, and sometimes nuts or candies before chilling it into a firm, sliceable treat. No oven, no mixer — just rich, fudgy chocolate with a satisfying crunch in every bite.
Perfect for summer days, last-minute gatherings, or prepping with kids, this cake is effortless yet impressive. Whether served in bars or broken into rustic chunks, it’s always a hit.
Ingredients Overview
Jamie Oliver’s style celebrates real ingredients with lots of texture and flavor. Let’s break down what goes into his signature fridge cake and what makes each part essential.
Dark Chocolate
The backbone of the cake. Choose good-quality dark chocolate (around 70%) for a deep, rich flavor. Jamie often uses a mix of dark and milk chocolate for balance — feel free to adjust to your preference.
Tip: Avoid overly sweet chocolate; the syrup and dried fruit add enough sweetness.
Unsalted Butter
Butter adds a silky richness to the melted chocolate mixture and helps it firm up when chilled. Use unsalted to control the salt levels more precisely.
Golden Syrup
A classic ingredient in UK baking, golden syrup brings a warm, slightly caramel flavor and helps bind the mixture. If unavailable, substitute with light corn syrup or honey.
Digestive Biscuits
Crushed biscuits provide the base crunch. Digestives are the traditional choice (similar to graham crackers), but Jamie often swaps in shortbread or rich tea biscuits for variety.
Variation: Use gluten-free biscuits if needed — just be sure they’re crunchy, not soft.
Dried Fruit
Dried cherries, cranberries, raisins, or apricots add chewy contrast and natural sweetness. Jamie often tosses in chopped dried figs or dates for something a little different.
Nuts (Optional)
Chopped walnuts, almonds, or hazelnuts add extra crunch and richness. Toast them first for even more flavor.
Candies or Treats
Jamie sometimes adds mini marshmallows, crushed honeycomb, or even Maltesers for texture and surprise. This is your moment to be playful — the more contrast, the better.
Sea Salt (Optional)
A pinch of flaky sea salt elevates the chocolate and balances the sweetness. Use sparingly — just enough to enhance, not overpower.
Step-by-Step Instructions
Making a chocolate fridge cake is fast and satisfying. Here’s how to create a version inspired by Jamie’s signature approach.
1. Prepare Your Pan
Line an 8-inch square or loaf pan with parchment paper, letting the edges overhang for easy lifting. You can also use a silicone mold for a clean release.
2. Crush the Biscuits
Place digestive biscuits in a zip-top bag and bash with a rolling pin. You want a mix of fine crumbs and larger chunks — texture is key.
3. Melt the Chocolate Mixture
In a heatproof bowl over simmering water (double boiler), melt the butter, chocolate, and golden syrup together, stirring gently until smooth and glossy. Remove from heat and let cool for a minute.
Shortcut: You can melt everything gently in the microwave in 30-second bursts, stirring in between, but the stovetop method gives you more control.
4. Stir in the Goodies
To the slightly cooled chocolate mixture, stir in:
-
Crushed biscuits
-
Chopped dried fruit
-
Optional: toasted nuts, mini marshmallows, or crushed candy
Mix until everything is coated in the glossy chocolate.
5. Pack into the Pan
Spoon the mixture into the prepared pan and press it down firmly with the back of a spatula or clean hands. Pressing firmly ensures clean slices and compact texture.
Sprinkle extra dried fruit, nuts, or sea salt on top if desired.
6. Chill
Refrigerate for at least 2–3 hours, or until completely firm. Overnight is even better.
7. Slice and Serve
Lift the slab from the pan and place on a cutting board. Use a sharp knife to slice into squares, bars, or rustic chunks. Wipe the blade between cuts for clean edges.
Store in the fridge in an airtight container for up to a week — though it rarely lasts that long.
Tips, Variations & Substitutions
Jamie-Style Tips
-
Use contrast: Combine chewy (fruit), crunchy (biscuits and nuts), and creamy (chocolate) for the most satisfying bite.
-
Play with flavor: Add orange zest, a splash of brandy, or instant espresso powder for grown-up flair.
-
Make it beautiful: Top with melted white chocolate drizzles or edible gold dust for a party-ready finish.
Ingredient Swaps
-
Vegan: Use dairy-free chocolate and vegan butter. Maple syrup or agave can replace golden syrup.
-
Nut-Free: Skip nuts and use seeds (like pumpkin or sunflower) for crunch.
-
Gluten-Free: Use gluten-free digestive-style biscuits or crunchy rice cookies.
Serving Ideas & Occasions
Chocolate fridge cake is endlessly versatile. Try serving it:
-
With coffee or tea for an afternoon pick-me-up
-
At kids’ parties cut into small squares or served on sticks
-
On a holiday dessert board alongside shortbread and truffles
-
As a freezer treat — freeze cut pieces and eat straight from the freezer (it’s like a chocolate bar!)
It’s equally at home at casual potlucks or elegant afternoon teas.
Nutritional & Health Notes
Fridge cake is undeniably rich, but when enjoyed in moderation, it’s a delightful treat. Each square is packed with energy-dense ingredients — butter, chocolate, and nuts — so a little goes a long way.
Healthier tweaks:
-
Use 70% dark chocolate to lower sugar content
-
Add seeds or whole grain biscuit options
-
Use dried fruit with no added sugar
This no-bake dessert is ideal for warm days or for anyone avoiding oven use.
FAQs
Q1: Can I make this ahead of time?
A1: Absolutely! Fridge cake improves with time. Make it a day ahead and keep it chilled until ready to serve.
Q2: Why is my fridge cake too soft or sticky?
A2: It likely needs more time in the fridge, or the chocolate-to-filler ratio is too low. Next time, use less syrup or more biscuit crumbs for structure.
Q3: Can I freeze chocolate fridge cake?
A3: Yes. Wrap slices tightly and freeze in an airtight container. Thaw in the fridge or enjoy directly from frozen — it holds its texture beautifully.
Q4: What kind of biscuits can I use?
A4: Digestives are traditional, but graham crackers, Biscoff, or shortbread work well. You want something crisp and absorbent, not too soft or buttery.
Q5: How do I make it look like Jamie’s?
A5: Jamie often leaves larger biscuit pieces and uses rustic presentation. He might top with crushed pistachios, dried rose petals, or zigzags of melted chocolate for visual appeal.
Q6: Can I add alcohol?
A6: Yes — a splash of rum, Baileys, or orange liqueur adds depth. Add it to the chocolate mixture before folding in the biscuits. Limit to 1–2 tablespoons to avoid affecting set.
Q7: Is this safe for kids?
A7: Totally. Just skip any alcohol and check for nut allergies. Kids love helping press the mixture into the pan — and licking the spoon!
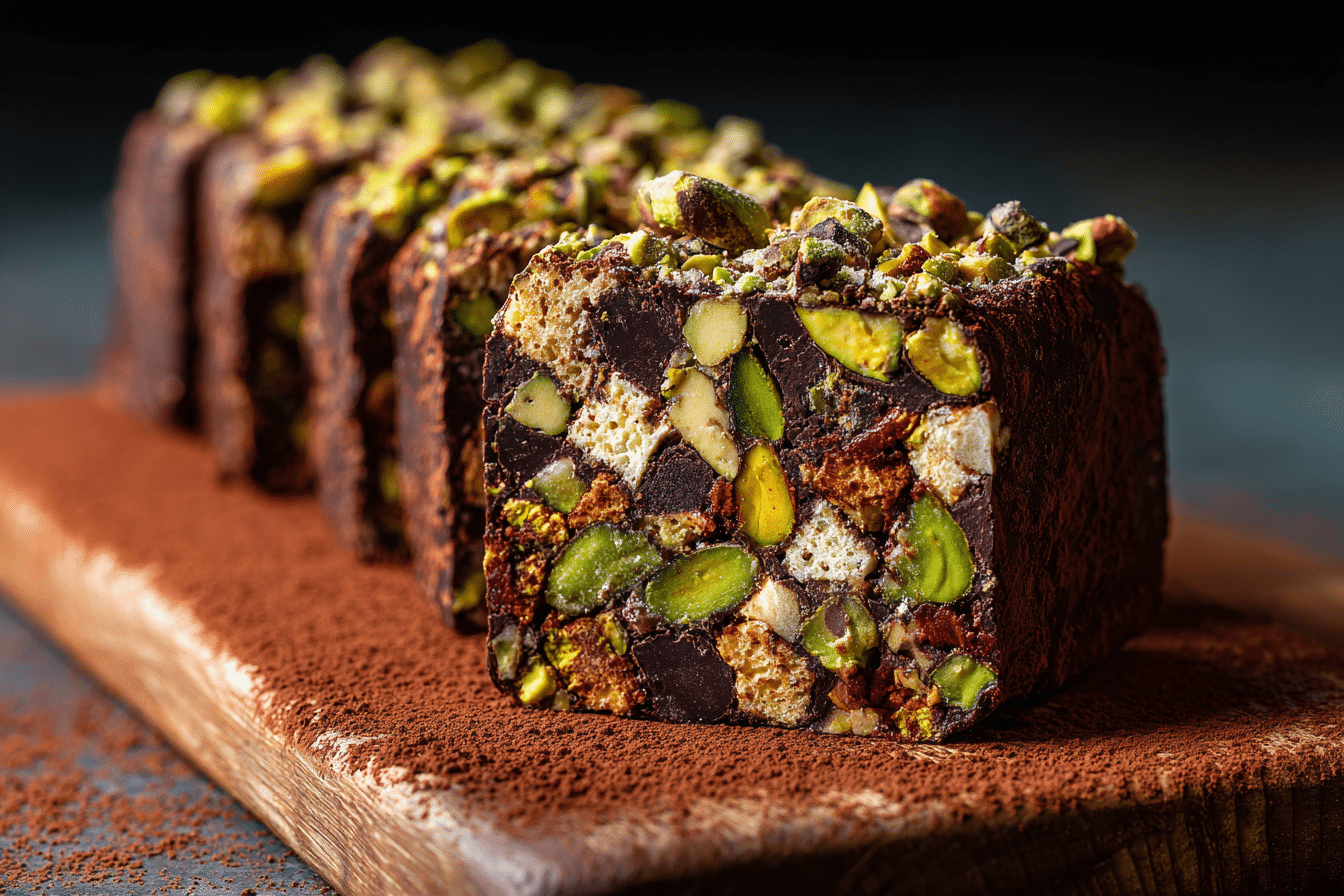
PrintChocolate Fridge Cake with Pistachios – No Bake Treat
Rich, crunchy no-bake chocolate fridge cake packed with biscuits, dried fruit, and your favorite add-ins — inspired by Jamie Oliver’s rustic, flexible style.
- Prep Time: 15 minutes
- Total Time: 3 hours 15 minutes
- Yield: 16 squares 1x
Ingredients
-
200g dark chocolate (70%)
-
100g milk chocolate
-
150g unsalted butter
-
150g golden syrup
-
250g digestive biscuits, crushed
-
100g dried fruit (raisins, cherries, apricots)
-
50g chopped nuts (optional)
-
50g mini marshmallows or candy pieces (optional)
-
Pinch of sea salt (optional)
Instructions
-
Line an 8-inch square pan with parchment paper.
-
Crush the biscuits into varied pieces.
-
In a heatproof bowl, melt chocolate, butter, and golden syrup over simmering water. Stir until smooth.
-
Remove from heat. Stir in biscuits, fruit, nuts, and optional extras.
-
Press mixture into the pan firmly.
-
Chill in the fridge for at least 3 hours or until set.
-
Lift from pan, slice into bars or squares, and serv
Notes
-
Add orange zest or a splash of liqueur for grown-up flavor.
-
Store in the fridge for up to 1 week.
-
Freezer-friendly for up to 3 months.