
This No-Bake Chocolate Cheesecake from Bake with Zoha is the kind of dessert that tastes like it took hours—but it comes together with minimal effort, no oven required. It’s rich, smooth, and indulgently creamy, with a deep chocolate flavor layered over a crunchy cookie crust. Perfect for chocolate lovers and casual bakers alike, it strikes a balance between luxurious and approachable.
The beauty of this cheesecake lies in its structure. The chocolate filling is luscious yet firm, setting up beautifully in the fridge without gelatin. The cookie crust offers a buttery crunch that pairs perfectly with the airy, truffle-like texture of the filling. Each bite melts away slowly, delivering waves of chocolate flavor that linger just long enough to keep you coming back for more.
Whether you’re hosting a dinner party, celebrating a birthday, or just want to whip up a treat that looks as good as it tastes, this no-bake chocolate cheesecake is a total win.
Ingredients Overview
Each component of this cheesecake is simple yet essential—together, they create a silky, sliceable dessert with layered texture and flavor.
Chocolate Cookies (Oreos or Digestives)
Used for the base. Choose chocolate sandwich cookies or plain cocoa biscuits. If using Oreos, you can leave the filling intact for a slightly sweeter, creamier crust.
Butter (Melted)
Binds the crust together and gives it that rich, buttery crunch. Use unsalted for better control over sweetness.
Dark Chocolate
The star of the show. Use a high-quality chocolate with 60–70% cocoa for a balanced, deep flavor. Avoid chocolate chips—they contain stabilizers that can affect the texture.
Cream Cheese
Softened, full-fat cream cheese gives the cheesecake its signature tang and structure. Room temperature cream cheese ensures a smoother filling.
Powdered Sugar
Sweetens the filling while blending easily with the other ingredients. Sift to prevent lumps.
Heavy Cream (Whipping Cream)
Whipped to soft peaks before folding into the filling, it adds airiness and helps the cheesecake set with a mousse-like texture.
Vanilla Extract
Adds a subtle warmth that complements the chocolate and enhances the overall flavor.
Optional: Instant Espresso Powder
Just ½ teaspoon deepens the chocolate flavor without making it taste like coffee.
Realistic Substitutions:
-
Gluten-Free: Use gluten-free chocolate cookies for the base.
-
Dairy-Free: Substitute with vegan cream cheese, coconut cream, and dairy-free chocolate.
-
Refined Sugar-Free: Use maple syrup in place of powdered sugar (but whip cream separately to avoid collapse).
Step-by-Step Instructions

-
Prepare the Crust
Crush 2 cups of chocolate cookies into fine crumbs using a food processor or zip-top bag and rolling pin. Mix with 6 tbsp melted butter until the texture resembles wet sand. -
Press into Pan
Press the crust mixture into the bottom of a 9-inch springform pan. Use the back of a spoon or flat-bottomed glass to pack it firmly. Chill in the fridge for at least 30 minutes while you make the filling. -
Melt the Chocolate
Melt 8 oz (about 1¼ cups) dark chocolate using a double boiler or in 30-second intervals in the microwave. Stir until smooth and set aside to cool slightly (but not solidify). -
Beat Cream Cheese and Sugar
In a large bowl, beat 16 oz cream cheese with ½ cup powdered sugar and 1 tsp vanilla extract until smooth and fluffy. If using espresso powder, add it here. -
Add Melted Chocolate
Pour the cooled, melted chocolate into the cream cheese mixture and beat until fully combined. The mixture should be silky and thick. -
Whip the Cream
In a separate bowl, whip 1 cup heavy cream to soft peaks. Gently fold the whipped cream into the chocolate mixture in two additions, being careful not to deflate it. -
Assemble and Chill
Pour the chocolate filling over the chilled crust and smooth the top with a spatula. Cover and refrigerate for at least 6 hours or overnight for best texture. -
Serve
Once fully set, run a knife around the edge of the pan and release the springform. Slice with a warm, clean knife for the best edges.
Common Mistakes to Avoid:
-
Warm ingredients: Let chocolate cool and cream cheese come to room temp before mixing.
-
Under-whipped cream: You want soft peaks—not too loose or stiff.
-
Rushing chill time: It needs several hours to fully set. Don’t skip this step.
Tips, Variations & Substitutions
Tips for Success:
-
Chill your mixing bowl before whipping cream for faster results.
-
For ultra-clean slices, dip your knife in warm water and wipe clean between cuts.
-
Use a removable-bottom pan for easier release and better presentation.
Flavor Variations:
-
Nutty Twist: Add crushed hazelnuts or almonds to the crust or sprinkle on top.
-
Salted Caramel: Drizzle with caramel and sea salt before serving.
-
Mint Chocolate: Add ½ tsp peppermint extract to the filling for a refreshing note.
-
Peanut Butter: Swirl in melted peanut butter before setting for a Reese’s-style upgrade.
Diet-Friendly Options:
-
Low-Sugar: Use a sugar substitute like powdered erythritol.
-
Vegan: Use plant-based cream cheese, coconut cream, and vegan chocolate.
-
Keto-Friendly: Almond flour crust and keto chocolate bars make a great low-carb version.
Serving Ideas & Occasions
This no-bake cheesecake is easy enough for everyday dessert, yet impressive enough for celebrations and guests.
Serving Suggestions:
-
Garnish with chocolate curls, whipped cream, or fresh berries.
-
Serve chilled with coffee, espresso, or cold brew for a perfect pairing.
-
Slice into bars or minis for elegant party trays.
Ideal Occasions:
-
Birthdays or anniversaries when oven space is limited
-
Hot summer days when baking isn’t an option
-
Holiday spreads or dessert tables with multiple options
Make-Ahead Friendly:
Can be made up to 2 days in advance and kept refrigerated. Best served cold but slightly softened.
Nutritional & Health Notes
Though indulgent, this cheesecake can be adjusted to meet different dietary preferences and needs.
Naturally Gluten-Free (with Substitution):
Using gluten-free cookies keeps the dessert accessible for those avoiding wheat.
No-Bake = Fewer Preservatives:
Skip boxed mixes and control exactly what goes in. Use organic cream cheese or high-quality chocolate to improve flavor and nutritional value.
Smaller Portions, Big Flavor:
A little goes a long way—this cheesecake is rich, so small slices satisfy. Serve in mini cups for portion-controlled elegance.
Refrigeration Tips:
Store in the fridge, tightly covered, for up to 4–5 days. Freeze individual slices for up to 1 month.
FAQs
1. Can I freeze this cheesecake?
Yes! Freeze slices individually wrapped, then thaw overnight in the fridge. Texture remains smooth and creamy.
2. What’s the best chocolate to use?
Use good-quality dark chocolate with 60–70% cacao. Avoid chocolate chips, which don’t melt smoothly.
3. Can I make this in a regular pie dish?
Yes, but the slices won’t be as tall or structured. A springform pan gives cleaner results and easier slicing.
4. How do I know it’s set?
After 6–8 hours, the filling should be firm to the touch and not jiggle in the center when shaken.
5. Can I use whipped topping instead of heavy cream?
Yes, but results will be sweeter and less rich. Use unsweetened whipped topping if possible.
6. Can I make it without cream cheese?
Cream cheese is essential for structure. Mascarpone is a good substitute, but Greek yogurt or ricotta won’t hold the same way.
7. Why is my filling grainy?
This can happen if the melted chocolate seizes. Let it cool before mixing and ensure your cream cheese is at room temperature.
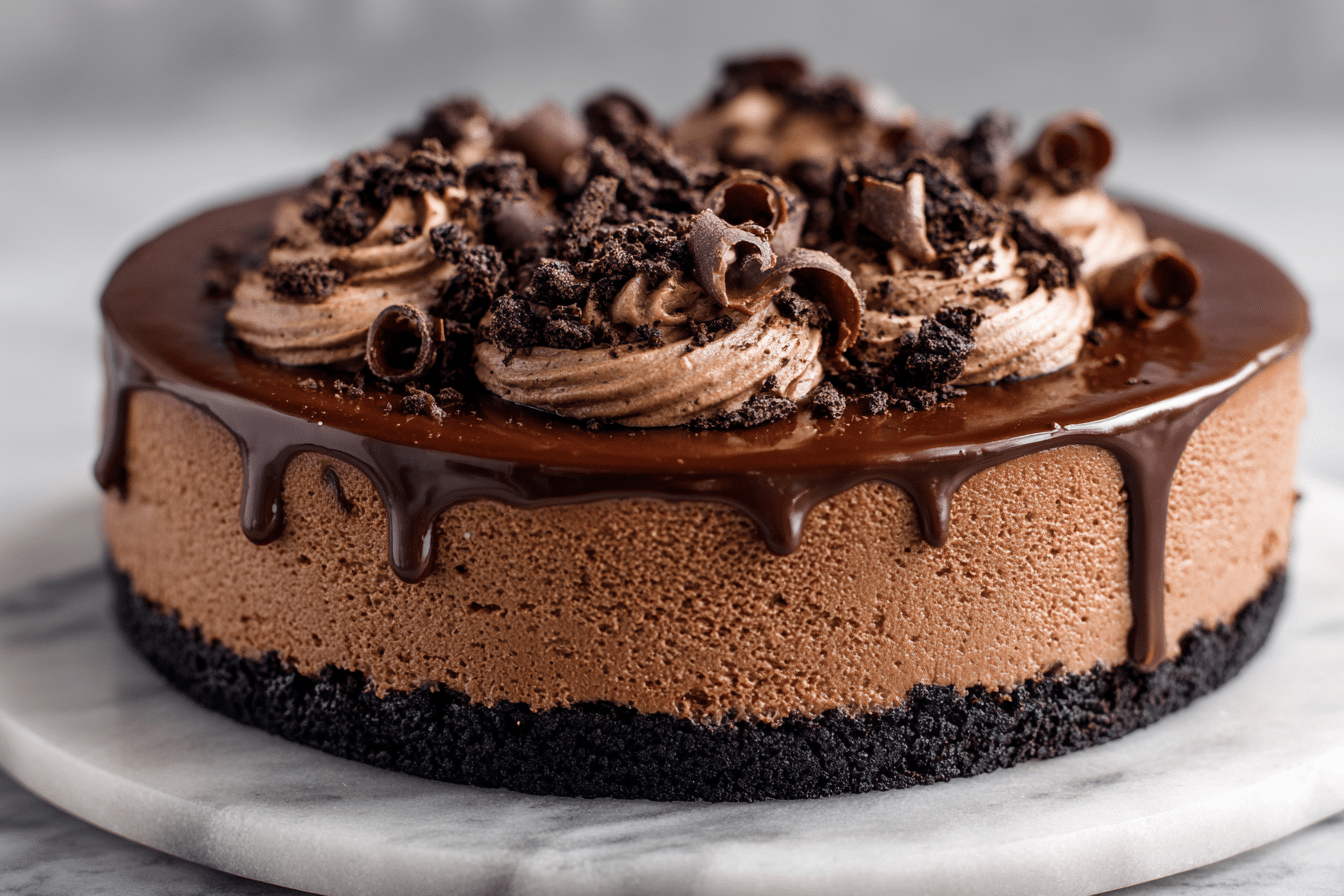
No-Bake Chocolate Cheesecake with Oreo Crust

Rich, creamy, and ultra-smooth, this No-Bake Chocolate Cheesecake from Bake with Zoha is made with dark chocolate, Greek-style whipped cream, and a chocolate cookie crust. No oven, no fuss—just indulgent results every time.
- Prep Time: 20 minutes
- Total Time: 6 hours 20 minutes
- Yield: 10 slices 1x
Ingredients
2 cups chocolate cookie crumbs
6 tbsp unsalted butter, melted
8 oz dark chocolate, melted and cooled
16 oz cream cheese, room temp
½ cup powdered sugar
1 tsp vanilla extract
1 cup heavy cream, whipped to soft peaks
Optional: ½ tsp instant espresso powder
Instructions
-
Mix cookie crumbs and butter. Press into 9-inch springform pan. Chill 30 minutes.
-
Melt chocolate and let cool.
-
Beat cream cheese, powdered sugar, vanilla, and espresso powder until smooth.
-
Add melted chocolate. Mix well.
-
Fold in whipped cream gently until fully combined.
-
Pour over crust. Smooth top.
-
Chill at least 6 hours or overnight. Slice and serve.
Notes
Use quality chocolate. Let ingredients reach room temp for smooth mixing. Chill completely before slicing.