
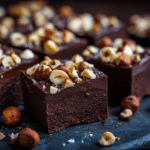
There’s something deeply satisfying about biting into a dense, chocolatey brownie—but what if you could skip the oven and still get all that fudgy goodness? These No-Bake Brownies are the answer. Packed with rich cocoa flavor, natural sweetness, and a melt-in-your-mouth texture, they’re a dream come true for those moments when you want a treat without turning on the stove.
I first made these on a scorching summer day when baking was the last thing on my mind. The result was better than expected: thick, chewy brownies with a deep chocolate flavor and just the right amount of crunch from nuts. They’re gluten-free, dairy-free (depending on your chocolate), and endlessly customizable. Whether you’re craving a quick dessert or need an energy-boosting snack, these brownies are ready in minutes and disappear just as quickly.
Ingredients Overview
Medjool Dates
These naturally sweet dates are the backbone of the recipe. When blended, they form a sticky, caramel-like base that holds everything together. Their deep, molasses-like flavor mimics the richness of traditional brownies without added sugar.
Almonds or Walnuts
These provide structure, texture, and healthy fats. Walnuts offer a softer bite and earthy taste, while almonds give a firmer crunch. You can toast them lightly for more depth of flavor, or keep them raw for a softer texture.
Unsweetened Cocoa Powder
The heart of the brownie’s chocolate flavor. Choose a high-quality cocoa for the best taste. Dutch-processed cocoa will give a smoother, deeper chocolate flavor, while natural cocoa offers a slightly more acidic edge.
Vanilla Extract
A touch of vanilla enhances the chocolate and rounds out the flavors. Pure vanilla extract makes a noticeable difference here.
Salt
Just a pinch brings all the flavors into balance. It cuts through the sweetness of the dates and enhances the richness of the cocoa.
Optional: Dark Chocolate Chunks or Chips
Fold in some dark chocolate pieces for extra indulgence and contrast. Choose dairy-free if you want to keep the recipe vegan.
Step-by-Step Instructions

Step 1: Prepare the Dates
If your dates are firm or dry, soak them in warm water for 10 minutes, then drain thoroughly. Soft, sticky dates are key to getting the right texture.
Step 2: Blend the Nuts
In a food processor, pulse the almonds or walnuts until finely ground. Be careful not to over-process—you want a meal, not nut butter.
Step 3: Add Cocoa and Dates
Add the cocoa powder, pitted dates, vanilla, and salt to the processor. Blend until the mixture comes together in a sticky dough. Scrape down the sides as needed. The mixture should hold together when pressed between your fingers.
Step 4: Press into Pan
Line an 8×8-inch pan with parchment paper. Press the brownie mixture evenly into the pan using your hands or the back of a spoon. Compact it well—it should be firm and even.
Step 5: Chill
Refrigerate for at least 1 hour to firm up. The brownies will be easier to cut once cold.
Step 6: Slice and Serve
Remove from the pan and slice into squares. You can trim the edges for a neater look or leave them rustic.
Avoid These Mistakes:
-
Don’t use dry, hard dates—they won’t bind the mixture properly.
-
Avoid over-processing the nuts, which can release oils and make the base greasy.
-
Make sure your cocoa is unsweetened to keep the flavor balanced.
Tips, Variations & Substitutions
Practical Tips:
-
Store the brownies in the fridge for up to 7 days or freeze for up to 3 months.
-
Press the mixture firmly into the pan to ensure clean slices.
-
Use a sharp knife to cut, wiping between slices for tidy edges.
Flavor Variations:
-
Add shredded coconut for a tropical twist.
-
Mix in mini chocolate chips or cacao nibs for crunch.
-
Add a teaspoon of instant espresso powder to deepen the chocolate flavor.
Substitutions:
-
Use cashews or pecans instead of almonds or walnuts.
-
Swap dates for dried figs or prunes if desired, but expect a slightly different flavor.
-
Almond extract can replace vanilla for a nuttier aroma.
Dietary Options:
-
For nut-free, try using sunflower seeds or oats in place of the nuts.
-
Vegan and gluten-free by default—just double-check your cocoa and chocolate labels.
Serving Ideas & Occasions
These No-Bake Brownies are flexible and fun to serve.
-
Cut into mini squares for a dessert board or party tray.
-
Pack them as a post-workout snack or lunchbox treat.
-
Serve chilled with a scoop of dairy-free ice cream.
-
Drizzle with melted chocolate and sea salt for a more decadent dessert.
They’re ideal for summer events, quick weeknight treats, and make-ahead desserts for guests. Their fudgy texture satisfies a chocolate craving without the hassle of baking.
Nutritional & Health Notes
These brownies are naturally sweetened and full of fiber, thanks to the dates and nuts. They’re higher in healthy fats and lower in processed ingredients than traditional brownies, making them a more balanced choice for chocolate lovers.
You get plant-based protein from the nuts and a slow-release energy boost from the dates. Cocoa powder adds a small amount of iron and antioxidants. Just remember, they’re still rich, so portioning matters. A small square delivers a powerful bite of flavor and energy.
As with any treat, enjoy them as part of a balanced diet, and adjust the ingredients if you’re managing dietary needs like sugar intake or food allergies.
FAQs
1. Can I make these without a food processor?
It’s possible but more difficult. You can try using a high-powered blender or finely chop everything by hand, but the mixture may not bind as well. A food processor gives the best texture.
2. What if I only have deglet noor dates?
Deglet noor dates are firmer and less sweet than Medjool dates. Soak them longer (15–20 minutes) and consider using a few more to match the sweetness and stickiness of Medjools.
3. Can I double the recipe?
Yes! Just use a larger pan—like a 9×13-inch—and make sure to press the mixture down evenly. Chill time may increase slightly.
4. How do I store no-bake brownies?
Keep them in an airtight container in the fridge for up to a week. For longer storage, wrap them individually and freeze. They thaw quickly at room temperature.
5. Are these brownies chewy or firm?
They’re soft, chewy, and slightly fudgy, with a bit of crunch from the nuts. Chilling them gives a firmer bite, while keeping them at room temperature softens the texture.
6. Can I add protein powder?
Yes, you can add a scoop of chocolate or unflavored protein powder. Reduce the amount of nuts slightly or add an extra date or two to maintain the right consistency.
7. Do these taste like traditional brownies?
They’re close in richness and texture, but not as cakey or sugary. The flavor is deeply chocolatey and naturally sweet, with a pleasant chew and nuttiness.
No-Bake Brownies – Fudgy, Chocolatey & So Simple
Rich, fudgy no-bake brownies made with dates, cocoa, and nuts. A quick, healthy treat that’s perfect for chocolate lovers, with no oven needed.
- Prep Time: 15 minutes
- Cook Time: 0 minutes
- Total Time: 1 hour 15 minutes
- Yield: 12 brownies 1x
Ingredients
1 1/2 cups Medjool dates, pitted
1 cup raw almonds or walnuts
1/3 cup unsweetened cocoa powder
1 tsp vanilla extract
Pinch of salt
1/4 cup dark chocolate chips or chunks (optional)
Instructions
-
If dates are dry, soak in warm water for 10 minutes, then drain.
-
Pulse nuts in a food processor until finely ground.
-
Add cocoa, dates, vanilla, and salt. Process until a sticky dough forms.
-
Press mixture into a parchment-lined 8×8-inch pan.
-
Chill for 1 hour to firm up.
-
Slice into squares and serve.
-
Store in fridge or freezer as desired.
Notes
Use soft Medjool dates for best texture. Swap nuts or add mix-ins like coconut or espresso powder for variety. These brownies are naturally vegan and gluten-free.