
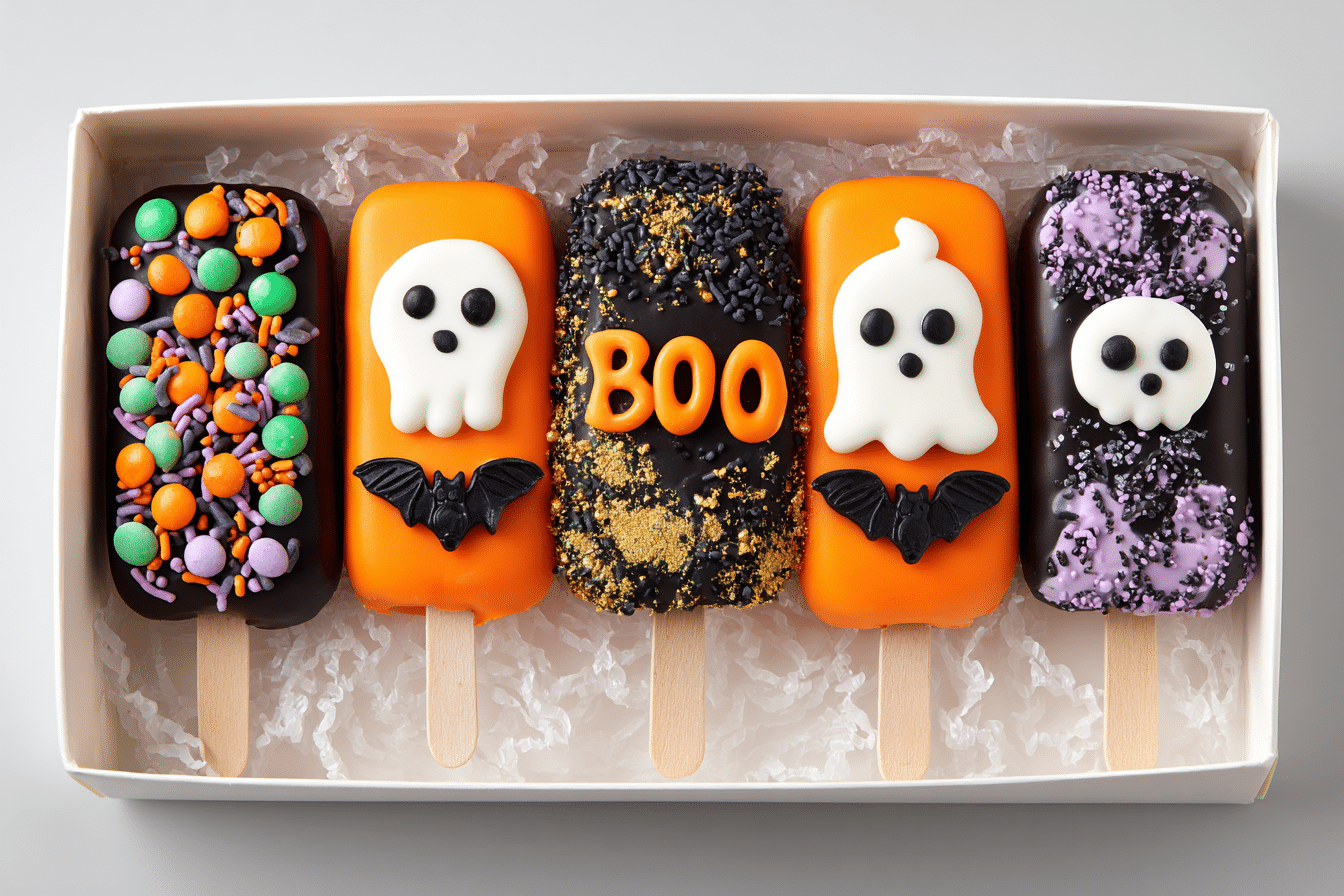
Spooky Monster Cakesicles are the ultimate Halloween party treat — cute, creepy, and absolutely delicious. Shaped like popsicles but made of moist cake and frosting on the inside, these cakesicles are coated in colorful candy melts and decorated with googly eyes, fangs, and silly monster expressions.
Unlike traditional cake pops, cakesicles are easier to assemble thanks to silicone molds, and they give you more room to get creative with decorations. Think vibrant monster colors, playful candy eyes, and messy “fur” piped from icing — every one is unique.
Perfect for Halloween parties, spooky bake sales, or a weekend baking project with kids, these cakesicles are as fun to make as they are to eat. Whether you go for silly, spooky, or downright gross, there’s no wrong way to decorate these edible monsters.
Ingredients Overview
The recipe breaks into three parts: the cake filling, the coating, and the decorations. Here’s how each ingredient contributes:
1. Cake Filling
-
Baked Cake (any flavor): You can use homemade or boxed cake — vanilla, chocolate, red velvet, or funfetti all work.
-
Frosting: Acts as a binder when mixed with the crumbled cake. Use buttercream, cream cheese frosting, or store-bought.
2. Candy Coating
-
Candy Melts or Colored Chocolate Wafers: These melt smoothly and come in Halloween-perfect shades like green, purple, orange, and black.
-
Coconut Oil or Shortening (optional): Helps thin the candy melts if they’re too thick for coating.
3. Decorations
-
Candy Eyes: Available in multiple sizes to create fun or freaky monster expressions.
-
Sprinkles: Add texture, “scales,” or monster “fur.”
-
Piping Gel or Colored Frosting: For drawing mouths, fangs, or scars.
-
Mini Candies: Like mini M&Ms, marshmallows, or jelly beans for ears, noses, or horns.
Ingredient Tips:
-
Avoid too much frosting — the mixture should be moldable, not mushy.
-
Use silicone cakesicle molds with built-in popsicle stick guides.
-
Work in small batches to keep candy coating from hardening mid-decorating.
Step-by-Step Instructions
Step 1: Make the Cake Mixture
-
Crumble one baked 8-inch cake (any flavor) into a large bowl.
-
Add ½ to ¾ cup of frosting and mix until the texture is like thick cookie dough.
-
Test by pressing a bit into your palm — it should hold together easily.
Step 2: Prepare the Cakesicle Molds
-
Melt candy melts in microwave-safe bowls, 30-second intervals, stirring in between until smooth.
-
Optional: Add 1 tsp of coconut oil per cup of melts to thin the mixture slightly.
-
Spoon a layer of melted candy into each silicone mold, coating the entire cavity, especially the sides.
-
Insert popsicle sticks into the guides. Chill for 5–10 minutes until set.
Step 3: Add the Cake Filling
-
Press the cake-frosting mixture into the candy-coated mold, leaving a little space on top.
-
Spoon more melted candy over the top to seal the cakesicle.
-
Smooth the surface and refrigerate for 30 minutes, or until fully hardened.
Step 4: Remove and Decorate
-
Gently pop cakesicles out of the mold.
-
Use melted chocolate or royal icing to attach candy eyes, draw faces, add fangs, or make “monster fur” with a piping bag.
-
Let decorations set fully before handling.
Tips, Variations & Substitutions
-
Color Themes: Go with purple and green for classic monsters, or orange and black for Halloween.
-
Texture Options: Roll cake mixture into balls for cake pops if you don’t have molds.
-
Flavor Variations:
-
Chocolate cake with peanut butter frosting for “Frankenstein fudge.”
-
Red velvet cake with cream cheese frosting for “vampire brains.”
-
-
Gluten-Free: Use gluten-free cake and frosting — the rest of the ingredients are naturally gluten-free.
-
Vegan Option: Choose vegan cake, dairy-free frosting, and vegan candy melts.
Helpful Tools:
-
Silicone cakesicle mold
-
Popsicle sticks
-
Piping bags and small round tips
-
Tweezers for precise candy placement
Serving Ideas & Occasions
Spooky Monster Cakesicles are ideal for:
-
Halloween Parties: Set up a decorate-your-own cakesicle station.
-
Kids’ Treats: Safe, mess-free, and individually portioned.
-
Classroom Goodies: Wrapped in clear treat bags, they make adorable handouts.
-
Baking Projects: A creative activity for kids on a rainy October afternoon.
They look great displayed upright in foam blocks or standing in rows on a platter covered in candy corn or sprinkles.
Nutritional & Health Notes
While these are a festive indulgence, here’s what to keep in mind:
-
Smaller Portions: Cakesicles are already portion-controlled — one per person is usually plenty.
-
Sugar: Candy melts and frosting are sweet, so use moderation and make smaller sizes if desired.
-
Allergen Awareness: Watch for dairy, gluten, or nut-containing ingredients — label clearly if sharing with groups.
For a slightly lighter option, use a less sweet cake (like banana or pumpkin) and reduce the frosting used.
FAQs
Q1: Can I make cakesicles ahead of time?
Yes! They can be made 3–4 days in advance and stored in the fridge. Bring to room temperature before serving.
Q2: Can I freeze decorated cakesicles?
You can, but condensation during thawing may cause decorations to bleed or fall off. Best to freeze uncoated cakesicles, then decorate after thawing.
Q3: What if my candy coating cracks?
The most common cause is temperature shock. Let cakesicles sit at room temp for a few minutes before unmolding to avoid cracking.
Q4: Do I need a cakesicle mold?
While a mold helps, you can hand-shape the cake mixture and dip it like cake pops. They won’t be as uniform but will still taste great.
Q5: How do I store leftovers?
Store in an airtight container in the fridge for up to 5 days. Avoid stacking unless fully set.
Q6: Can kids help make these?
Absolutely. Kids love helping with decorations — just supervise when using melted chocolate.
Q7: What kind of cake works best?
Moist cakes like chocolate, vanilla, red velvet, or even funfetti work well. Avoid overly dry or crumbly cakes for best texture.
Cute & Spooky Monster Cakesicles
Cute and creepy Halloween cakesicles made with moist cake, frosting, and candy melts. Decorated like silly monsters — no baking skills required.
- Prep Time: 30 minutes
- Cook Time: 45 minutes
- Total Time: 1 hour 15 minutes
- Yield: 10 cakesicles 1x
Ingredients
-
1 (8-inch) baked cake (any flavor)
-
½–¾ cup frosting
-
2 cups candy melts (various colors)
-
1–2 tsp coconut oil (optional)
-
Candy eyes, sprinkles, mini candies
-
Piping gel or colored icing for decorating
Instructions
-
Crumble cake into a bowl. Mix in frosting until dough-like.
-
Melt candy melts. Coat cakesicle molds with melted coating. Insert sticks. Chill.
-
Press cake mixture into molds. Cover with more melted candy. Chill until set.
-
Remove from mold and decorate with candy eyes, piping gel, and sprinkles.
-
Chill again briefly before serving.
Notes
-
Use a piping bag for clean decoration.
-
Make ahead and store chilled.
-
Add food-safe glitter or shimmer dust for extra fun.