
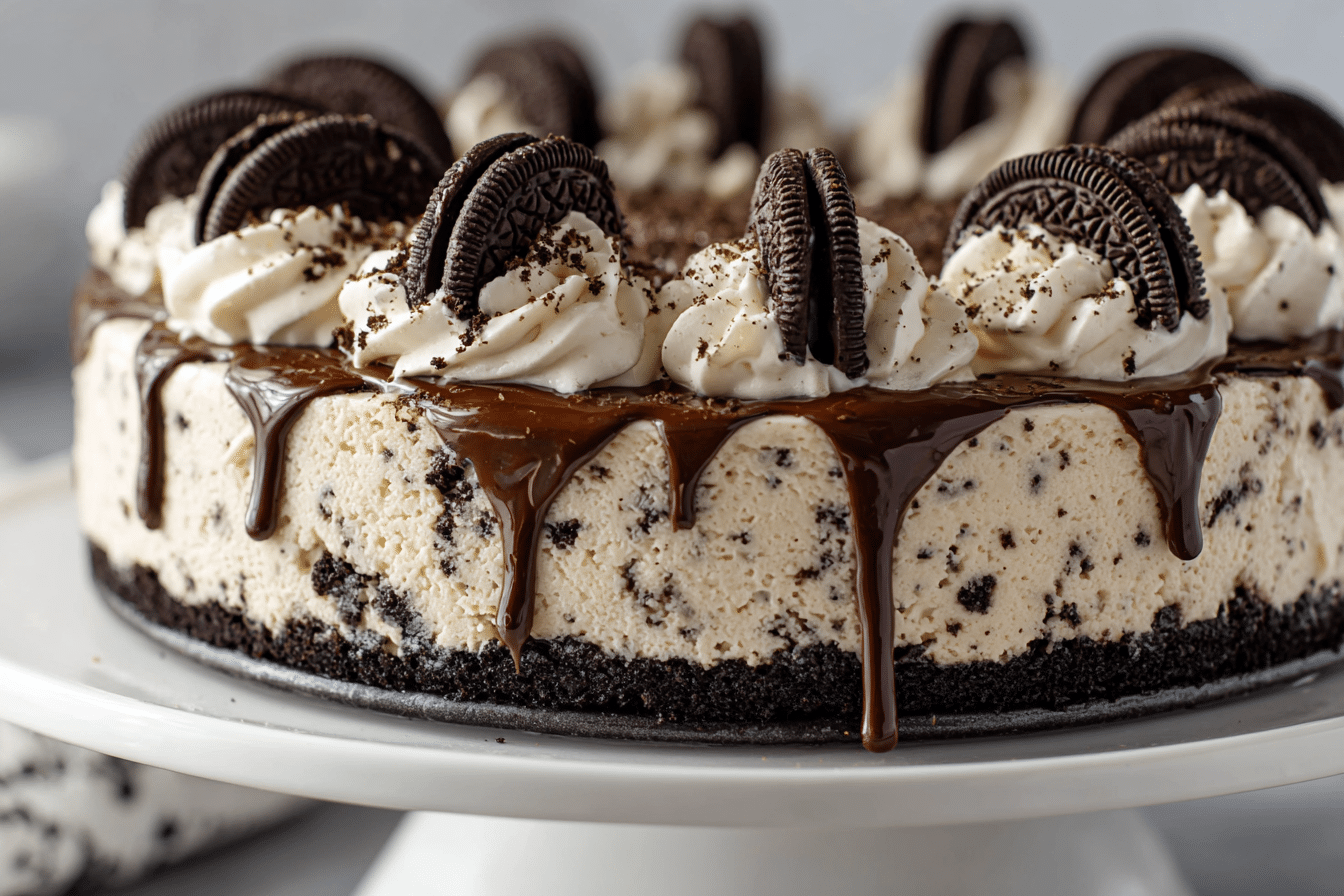
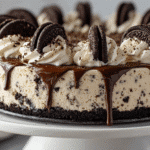
Few desserts strike the perfect balance between nostalgic, indulgent, and effortless like a No-Bake Oreo Cheesecake. With its rich, creamy filling and iconic chocolate cookie crunch, this homemade treat is every Oreo lover’s dream come true — no oven required.
The no-bake cheesecake became popular in the mid-20th century, when easy-to-make, chilled desserts became a household favorite. Add Oreos into the mix, and you have a dessert that’s both modern and timeless.
This cheesecake features a buttery Oreo cookie crust, a silky-smooth cream cheese filling folded with crushed cookies, and a topping that can be as simple or as decadent as you’d like. Perfect for hot days, busy weeknights, or festive gatherings, it’s a guaranteed hit.
Ingredients Overview
Each layer of this no-bake Oreo cheesecake works in harmony to deliver bold flavor and luscious texture. Here’s what you need and why it matters.
Crust
-
Oreo Cookies: Used whole (cream and all), they create a chocolatey, slightly salty base. Classic Oreos are best, but you can experiment with Golden or flavored varieties.
-
Melted Butter: Helps the crushed cookies bind into a firm crust. Unsalted butter is ideal for flavor balance.
Filling
-
Cream Cheese: Full-fat cream cheese gives the filling its classic tang and thick texture. Be sure to soften it for smooth blending.
-
Powdered Sugar: Dissolves easily into the cream cheese without creating a grainy texture.
-
Vanilla Extract: Adds a layer of flavor that complements both the cream and the cookies.
-
Heavy Whipping Cream: When whipped to stiff peaks, it provides the airiness and lightness that balances the richness of the cream cheese.
-
Crushed Oreos: Folded into the filling for flavor, texture, and those signature cookie specks throughout.
Topping (Optional but Recommended)
-
Whipped Cream: Either homemade or store-bought for a soft, cloud-like topping.
-
Oreo Halves or Crumbs: A simple but beautiful finishing touch.
Step-by-Step Instructions
Making this Oreo cheesecake doesn’t require baking or fancy tools — just a little chilling time and the right technique.
Step 1: Make the Crust
-
In a food processor, pulse 24 Oreo cookies into fine crumbs.
-
Add 5 tablespoons melted butter and pulse again until evenly combined.
-
Press the mixture firmly into the bottom of a 9-inch springform pan using the bottom of a glass or measuring cup.
-
Chill in the refrigerator for at least 30 minutes to set the crust.
Step 2: Prepare the Filling
-
In a large bowl, beat 16 oz (two 8-oz blocks) softened cream cheese with ¾ cup powdered sugar and 1 teaspoon vanilla extract until smooth and creamy.
-
In a separate bowl, whip 1 cup heavy cream to stiff peaks.
-
Gently fold the whipped cream into the cream cheese mixture with a rubber spatula.
-
Crush 10–12 Oreo cookies (medium chunks preferred) and fold them into the filling mixture.
Step 3: Assemble the Cheesecake
-
Spoon the filling over the chilled crust and smooth the top evenly.
-
Cover with plastic wrap or foil and refrigerate for at least 6 hours, preferably overnight, until fully set.
Step 4: Decorate and Serve
-
Once set, release the cheesecake from the springform pan.
-
Top with swirls of whipped cream, halved Oreos, or a sprinkle of crumbs.
-
Slice with a warm knife for clean edges and serve chilled.
Tips, Variations & Substitutions
Expert Tips
-
Use room temperature cream cheese: This ensures a lump-free, smooth filling.
-
Don’t overwhip the cream: Stiff peaks are ideal, but overwhipping can lead to a grainy texture.
-
Chill thoroughly: Allow plenty of time for the cheesecake to set for clean slicing.
Variations
-
Mint Oreo Cheesecake: Use Mint Oreos and a few drops of peppermint extract for a refreshing twist.
-
Peanut Butter Oreo Cheesecake: Swirl in ¼ cup peanut butter to the filling before folding in the cookies.
-
Chocolate Topping: Add a ganache layer (chocolate and cream) for an extra decadent top.
Substitutions
-
Gluten-Free: Use gluten-free sandwich cookies (many brands make gluten-free Oreos).
-
Dairy-Free: Use vegan cream cheese and a dairy-free whipped topping like coconut cream.
-
Low-Sugar: Try sugar-free sandwich cookies and a powdered sweetener like Swerve.
Serving Ideas & Occasions
This no-bake Oreo cheesecake is a showstopper for:
-
Birthday parties and celebrations
-
Potlucks and picnics — no baking means less prep time
-
Summer holidays when oven use is minimal
-
Weeknight desserts that feel fancy but require minimal effort
Serve it with:
-
Fresh berries for a fruity balance
-
A drizzle of chocolate or caramel sauce
-
A scoop of vanilla or cookies and cream ice cream for double cookie impact
Each slice offers a dreamy combo of crunchy crust, creamy filling, and that beloved Oreo flavor in every bite.
Nutritional & Health Notes
This is a dessert that leans indulgent — but worth every spoonful. Each slice (1/12 of the cake) delivers about 400–500 calories, with a balance of fats and sugars from the cream cheese, cookies, and cream.
For lighter versions, use reduced-fat cream cheese and lighten the whipped cream with Greek yogurt or low-fat alternatives. You can also scale down portion sizes — this dessert is rich, so even a small slice satisfies.
The Oreos provide a fun crunch and nostalgic sweetness, while the whipped cream keeps the texture cloud-like and less dense than traditional baked cheesecakes.
FAQs
Q1: Can I make this Oreo cheesecake ahead of time?
Yes! It’s best made the day before serving. It needs at least 6 hours to set, but overnight chill yields the firmest, cleanest slices.
Q2: Can I freeze no-bake Oreo cheesecake?
Absolutely. Freeze the fully set cheesecake (without toppings) wrapped tightly in plastic and foil for up to 1 month. Thaw in the fridge overnight before serving.
Q3: How do I prevent the crust from crumbling?
Make sure your butter-to-crumb ratio is right, and press the mixture firmly into the pan. Chilling for at least 30 minutes helps it stay firm when sliced.
Q4: Can I use store-bought whipped topping instead of whipping cream?
Yes. One 8 oz tub of whipped topping (like Cool Whip) can be substituted for homemade whipped cream. Fold it in gently to maintain a fluffy texture.
Q5: Can I make mini no-bake Oreo cheesecakes?
Definitely! Use a muffin pan with liners and press about 1 tablespoon of crust mixture into each. Divide filling evenly. Chill for 4 hours minimum.
Q6: What’s the best way to cut clean slices?
Use a sharp knife dipped in hot water, wiping between slices. This ensures smooth cuts through the cream cheese layer.
Q7: How long will leftovers last?
Stored in the fridge in an airtight container, the cheesecake stays fresh for up to 5 days. For longer storage, freeze individual slices.
PrintChocolate Cream Oreo Cheesecake No Oven Needed
This no-bake Oreo cheesecake is creamy, rich, and filled with crushed cookies — all layered over a buttery Oreo crust. A chilled, crowd-pleasing dessert with no oven required.
- Prep Time: 20 minutes
- Total Time: 6 hours 20 minutes
- Yield: 12 slices 1x
Ingredients
-
24 Oreo cookies (for crust)
-
5 tbsp unsalted butter, melted
-
16 oz cream cheese, softened
-
¾ cup powdered sugar
-
1 tsp vanilla extract
-
1 cup heavy whipping cream
-
10–12 Oreo cookies, roughly crushed (for filling)
-
Optional toppings: whipped cream, extra Oreos, chocolate sauce
Instructions
-
Pulse 24 Oreos in a food processor into fine crumbs. Mix with melted butter and press into a 9-inch springform pan. Chill for 30 minutes.
-
Beat cream cheese, powdered sugar, and vanilla until smooth.
-
In a separate bowl, whip heavy cream to stiff peaks.
-
Gently fold whipped cream into the cream cheese mixture.
-
Fold in crushed Oreos.
-
Spread filling over the crust. Smooth the top and refrigerate for at least 6 hours or overnight.
-
Top with whipped cream and extra Oreos before serving.
Notes
Use a hot knife for clean slicing. Store leftovers in the fridge for up to 5 days or freeze for 1 month.