
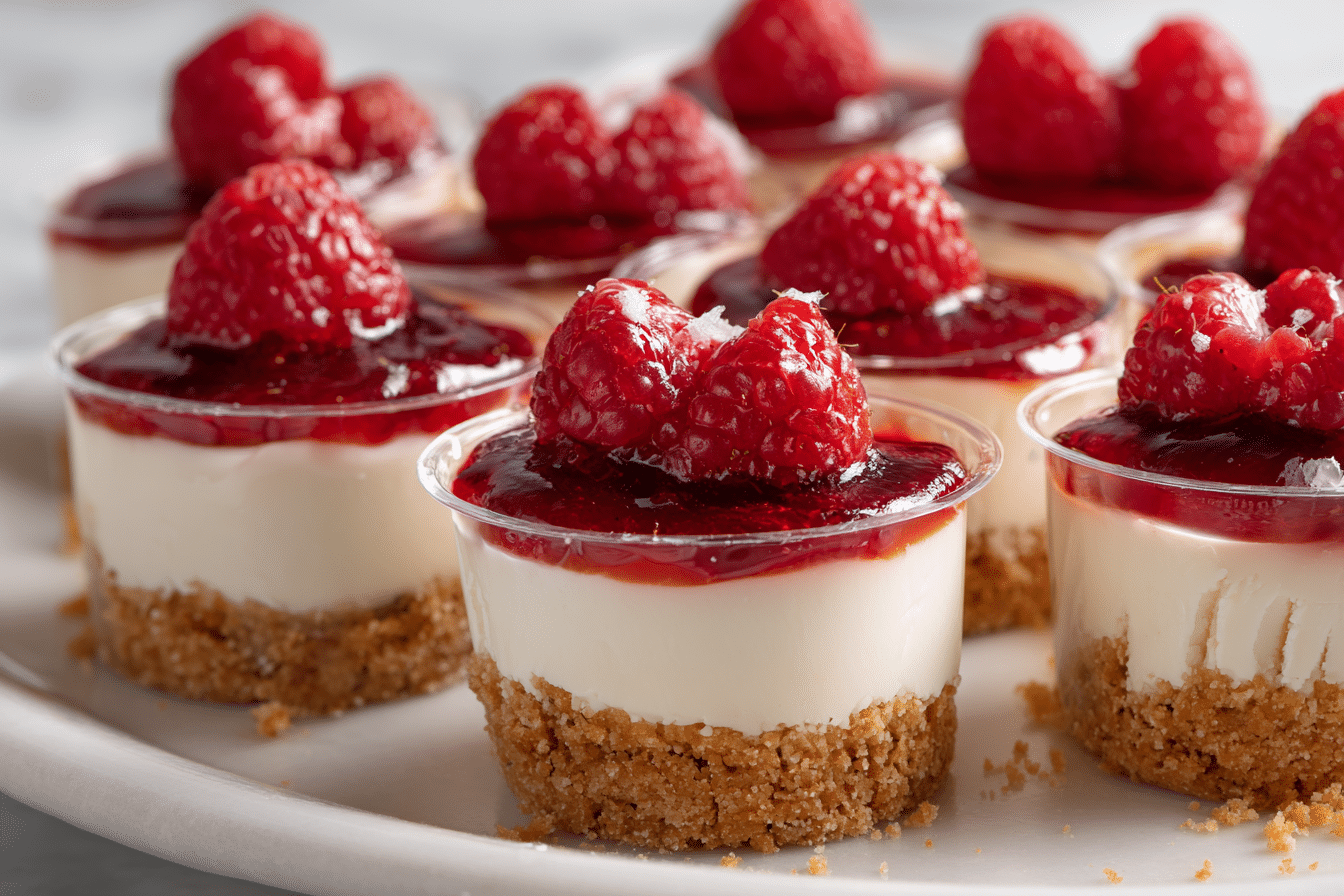
No-bake cheesecake cups are the answer when you need a dessert that’s creamy, satisfying, and effortless. With no oven required, these individual treats come together in under 30 minutes and chill to silky perfection.
Each cup features a buttery graham cracker crust, a whipped cream cheese filling that’s rich yet airy, and endless topping possibilities—from fresh fruit to chocolate drizzle or cookie crumbles. They’re perfect for parties, potlucks, make-ahead desserts, or just treating yourself on a weeknight.
Simple, delicious, and made with pantry staples, these cheesecake cups are a low-stress, high-reward dessert you’ll want to make again and again.
Ingredients Overview
Each component in this no-bake recipe is essential for flavor, texture, and ease. Here’s what you’ll need and why:
For the Crust:
-
Graham cracker crumbs: The classic cheesecake base. You can use store-bought crumbs or crush whole graham crackers yourself.
-
Swap: Use crushed Oreos, Biscoff cookies, or digestive biscuits for variation.
-
-
Melted butter: Helps bind the crumbs and adds richness.
-
Sugar (optional): Adds a touch of sweetness to the crust.
For the Cheesecake Filling:
-
Cream cheese: Full-fat, brick-style cream cheese is best for structure and richness. Soften it to room temperature for smooth blending.
-
Powdered sugar: Sweetens without making the filling grainy. Adjust to taste.
-
Vanilla extract: Adds a warm, bakery-style flavor.
-
Heavy cream: Whipped and folded into the cream cheese to lighten the texture.
-
Tip: Chill the cream and beaters for best results.
-
Toppings (optional but fun!):
-
Fresh berries or sliced fruit
-
Fruit compote or jam
-
Chocolate shavings or chips
-
Cookie crumbles (Oreos, Biscoff, graham)
-
Caramel or chocolate sauce
These cheesecake cups are endlessly customizable. Whether you go fruity, chocolatey, or classic, the base is a creamy canvas for your favorite flavors.
Step-by-Step Instructions
Step 1: Make the crust
-
In a bowl, mix:
-
1 cup graham cracker crumbs
-
4 tablespoons melted butter
-
1 tablespoon granulated sugar (optional)
-
-
Stir until the mixture resembles wet sand. Spoon about 1½ tablespoons into each small cup, jar, or ramekin. Press down gently with the back of a spoon. Chill while preparing the filling.
Step 2: Make the cheesecake filling
-
In a large bowl, beat 8 oz softened cream cheese until smooth and fluffy (about 2–3 minutes).
-
Add ½ cup powdered sugar and 1 teaspoon vanilla extract. Beat again until well combined and creamy.
-
In a separate bowl, whip ¾ cup cold heavy cream until stiff peaks form (3–4 minutes with a hand mixer on high speed).
-
Gently fold the whipped cream into the cream cheese mixture in batches, keeping the mixture light and fluffy.
Step 3: Assemble the cups
-
Spoon or pipe the cheesecake filling over the chilled crusts. Smooth the tops with a spatula or the back of a spoon.
-
Chill the cups in the refrigerator for at least 2 hours (or up to overnight) to firm up the filling.
Step 4: Add toppings
Just before serving, top with your choice of:
-
Fresh strawberries, raspberries, or blueberries
-
Swirls of jam or lemon curd
-
Cookie crumbles or mini chocolate chips
-
Whipped cream and a drizzle of chocolate or caramel
Tips, Variations & Substitutions
-
Make it fruity: Layer strawberry or raspberry jam between the crust and filling.
-
Chocolate lovers: Use crushed Oreos for the base and add cocoa powder or melted chocolate to the filling.
-
Mini versions: Use mini cupcake liners for bite-sized cheesecake treats—great for parties.
-
Dairy-free option: Use plant-based cream cheese and whipped topping.
-
Low-sugar version: Replace sugar with a powdered sugar alternative and use unsweetened toppings like fresh fruit.
You can assemble these in mason jars, small glass cups, or even reusable plastic dessert cups—perfect for entertaining.
Serving Ideas & Occasions
No-bake cheesecake cups are great for:
-
Summer desserts (no oven required!)
-
Birthday parties and baby showers
-
Picnic or BBQ-friendly treats
-
Make-ahead holiday desserts
-
Romantic dinners or date nights
They’re elegant enough for a formal gathering and simple enough for a weeknight treat.
Serve them cold with a spoon and enjoy the creamy, dreamy texture that’s both refreshing and indulgent.
Nutritional & Health Notes
These cheesecake cups are rich in dairy fats and sugars, so they’re best enjoyed as a treat. You can lighten them up by:
-
Using reduced-fat cream cheese
-
Sweetening with a natural alternative like monk fruit or erythritol
-
Using Greek yogurt in place of some cream cheese for protein and tang
Portion control is easy with single-serving cups, and the use of fresh fruit makes for a refreshing finish.
FAQs
Q1: Can I make these ahead of time?
A1: Yes! They’re perfect for making a day ahead. Chill them covered in the fridge for up to 2–3 days. Add toppings just before serving.
Q2: Can I freeze no-bake cheesecake cups?
A2: You can freeze them, but for best texture, freeze without toppings. Thaw in the fridge before serving.
Q3: Do I need gelatin or eggs?
A3: No gelatin or eggs needed. The whipped cream adds structure and stability to the no-bake filling.
Q4: Can I use store-bought whipped topping?
A4: Yes, you can substitute the homemade whipped cream with about 1½ cups of whipped topping like Cool Whip for convenience.
Q5: How long do they need to chill?
A5: At least 2 hours is best for the filling to firm up. Overnight works great too.
Q6: What’s the best way to crush graham crackers?
A6: Use a food processor or seal them in a zip-top bag and crush with a rolling pin until fine.
Q7: Can I make them vegan?
A7: Absolutely! Use vegan cream cheese, dairy-free whipped topping, and plant-based butter and cookies for the crust.
PrintNo Bake Cheesecake Cups for Parties
Creamy, no-bake cheesecake cups with a graham cracker crust, whipped filling, and customizable toppings. Quick to make and perfect for any occasion.
- Prep Time: 20 minutes
- Total Time: 2 hours 20 minutes
- Yield: 6–8 servings 1x
Ingredients
For the Crust:
-
1 cup graham cracker crumbs
-
4 tbsp unsalted butter, melted
-
1 tbsp sugar (optional)
For the Filling:
-
8 oz cream cheese, softened
-
½ cup powdered sugar
-
1 tsp vanilla extract
-
¾ cup heavy cream, cold
Toppings (optional):
-
Fresh fruit, jam, cookie crumbs, whipped cream, or chocolate sauce
Instructions
-
Mix crust ingredients and press into serving cups. Chill.
-
Beat cream cheese, sugar, and vanilla until smooth.
-
Whip cream to stiff peaks, then fold into cream cheese.
-
Spoon or pipe filling over crusts. Chill for 2–3 hours.
-
Add toppings and serve cold.
Notes
-
Store in fridge up to 3 days.
-
Can be frozen without toppings.
-
Use Oreos or Biscoff cookies for crust variations.